Application Integration Case:
Detection Model Training Tutorial I. Project Overview
- This tutorial is suitable for tasks with a small number of targets and simple backgrounds; it is suitable for novice who have not been exposed to model training.
- This tutorial guides you through the generation of target detection models by training YOLO detection models in stages.
The process includes: Acquire a large number of images -> Select a small number to train the YOLOv8 detection model -> Use this model to detect the remaining images and manually fine-tune the annotation data -> Retrain a more accurate new model with all the annotation data. - Recommended camera models include: D435i, D435, D41, D455, L515, T265. This article takes D435 as an example.
II. Related Downloads
| Type | Name | Download Address |
|---|---|---|
| Installation package | Anaconda | Please click Download to enter Baidu Netdisk for download. |
| Labelme | ||
| Text | requirements.txt | Please click Download to enter GitHub to download the corresponding script file. |
| Script | data_collect.py | |
| final.py | ||
| txt2json.py | ||
| yolov8.py |
III. Python Environment Installation
Anaconda is powerful in environmental isolation and package management. This article takes the installation of Anaconda as an example to construct a python environment. The Anaconda installation package version takes Anaconda3-2024.10-1-Windows-x86_64.exe as an example.
Open the Anaconda installation software downloaded in the Related Downloads section and click
Next.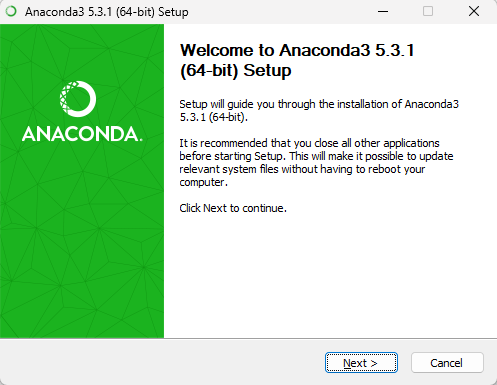
Click
I Agree.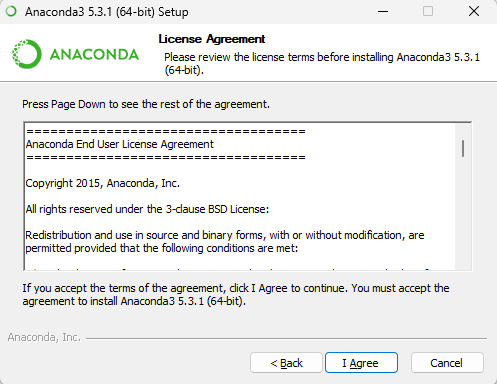
After checking the installation type, click
Next.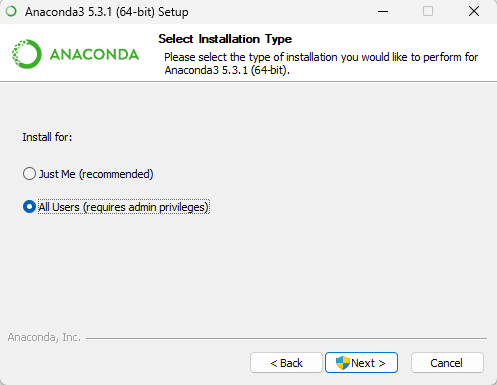
Click
Browse...to select the installation path, then clickNext.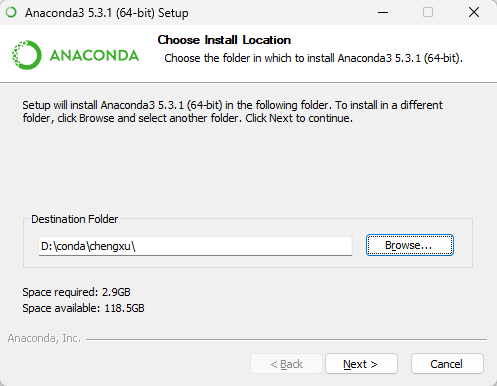
Check
Add Anaconda to the system PATH environment variableandRegister Anaconda as the system Python 3.7, then clickInstall.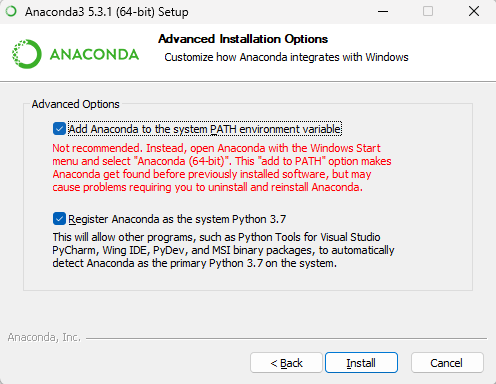
TIP
- Add Anaconda to the system PATH environment variable: It is officially not recommended to add Anaconda to the PATH environment variable for fear of interfering with other software. Instead, you can use Anaconda by opening Anaconda Navigator or Anaconda Prompt from the start menu (in fact, it doesn't matter whether it is checked or not, PATH can be changed later). You need to check here. You can start the Conda command in cmd.
- Register Anaconda as the system Python 3.7: Check this checkbox unless you plan to install and run multiple versions of Anaconda or multiple versions of Python.
When the content shown in the figure below is displayed, click
Skipto skip the VSCode installation.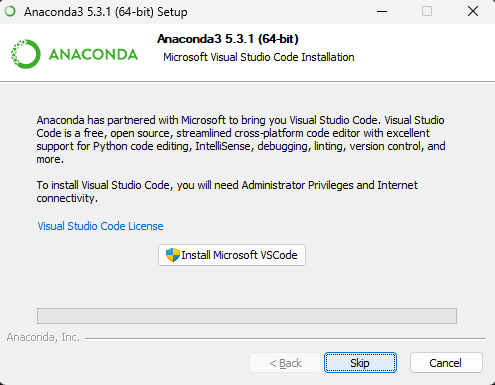
Click
Finishto complete the installation.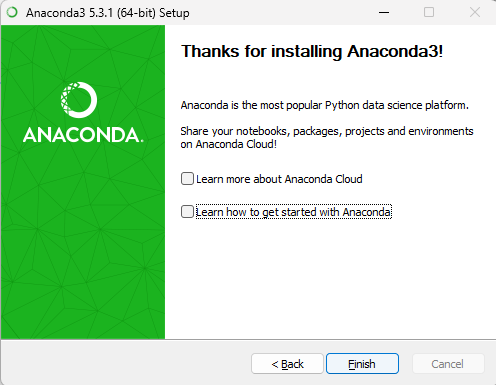
Open cmd and enter the following command to query the installed Conda version number.
cmdconda --versionIf the Conda version number can be checked, it means that anaconda has been successfully installed, as shown in the figure below.

IV. Software Package Installation
Create a Python Virtual Environment
Open the cmd command line interpreter and enter the following command to create a detect virtual environment for Python 3.9, as shown in the figure below.
cmdconda create -n detect python=3.9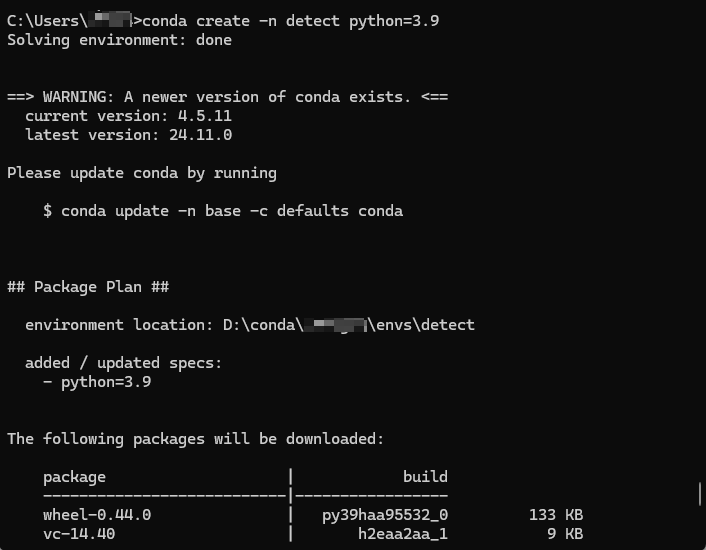
If it exists
([y]/n)?during the creation process, enter “y” to continue the installation.After the installation is complete, execute the following command.
cmdconda env listYou can check whether the virtual environment detect is successfully created, as shown in the figure below.
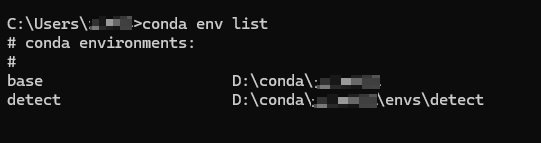
The above picture shows that the virtual environment was successfully created.
Software Packages Required for the Installation Environment
Execute the following command to activate the virtual environment detect.
cmdconda activate detectExecute the following command to install the required software package.
cmdpip install pyrealsense2==2.55.1.6486 pip install opencv-python==4.10.0.84 pip install numpy==2.0.2 pip install PyYAML==6.0.2 pip install ultralytics==8.3.38 pip install tqdm==4.67.1 pip install pillow==11.0.0 pip install scikit-learn==1.5.2 -i https://pypi.mirrors.ustc.edu.cn/simple/Or execute the following script to install the required software package.
cmdpip install -r requirements.txtAmong them, requirements.txt is the text file downloaded in theRelated Downloads section.
V. Data Acquisition
Acquisition Code
WARNING
When the acquisition code is running, you need to use a docking station to connect the D435 camera and the computer to prevent program interruption due to line transmission problems during the acquisition process.
data_collect.py is the script file downloaded in the Related Downloads.
The script file code example is as follows:
"""
Collect image data for training YOLOv8
"""

import pyrealsense2 as rs
import cv2
import os
import time
import numpy as np
import re

# Create a folder to save images
color_output_folder = 'images\images'
os.makedirs(color_output_folder, exist_ok=True)

# Get the maximum sequence number of existing images in the current folder
existing_images = [f for f in os.listdir(color_output_folder) if f.lower().endswith('.png')]
max_number = 0
pattern = re.compile(r'^(\d+)\.png$')
for img_name in existing_images:
    match = pattern.match(img_name)
    if match:
        number = int(match.group(1))
        if number > max_number:
            max_number = number
start_index = max_number  # The next image sequence number starts from max_number + 1


# Camera configuration
pipeline = rs.pipeline()
config = rs.config()
config.enable_stream(rs.stream.depth, 640, 480, rs.format.z16, 30)
config.enable_stream(rs.stream.color, 640, 480, rs.format.bgr8, 30)
profile = pipeline.start(config)

# Create an alignment object
align_to = rs.stream.color
align = rs.align(align_to)

print('<<<<<<<<<<<<<<<<<<<<<<<<<<<<<   Start Detectionqq >>>>>>>>>>>>>>>>>>>>>>>>>>>>')

start_time = time.time()
frame_count = 0

while True:

    frames = pipeline.wait_for_frames()
    aligned_frames = align.process(frames)
    aligned_depth_frame = aligned_frames.get_depth_frame()
    color_frame = aligned_frames.get_color_frame()
    depth_image = np.asanyarray(aligned_depth_frame.get_data())
    color_image = np.asanyarray(color_frame.get_data())

    # Generate file name
    frame_number = start_index + frame_count + 1
    filename = f'{frame_number:04d}.png'
    color_file_path = os.path.join(color_output_folder, filename)

    cv2.imshow('Color Image', color_image)

    c = cv2.waitKey(1) & 0xFF

    if c == ord('s'):
        cv2.imwrite(color_file_path, color_image)
        frame_count += 1
        print(f'frame_count:{frame_count}')

    elif c == ord('q'):
        break


# Close windows and stop the camera
cv2.destroyAllWindows()
pipeline.stop()

print(f'Total frames captured: {frame_count}')
Precautions for Acquisition
Attention shall be paid to the following aspects when acquire images:
- Number of images acquired: Ensure that there are 500+ images in each category. If the category is particularly complex or the target changes greatly, it is recommended to increase it to 1,000 or more.
- Acquisition Scenario: for the actual application of the model.
- Aquire data in different scenarios, contexts and environments.
- Images of the target object are acquired from different angles and distances.
- Acquire data under different lighting conditions.
Acquisition Steps
- Run the image acquisition script data_collect.py in the Python environment and a camera viewfinder pop-up window will appear at this point.
- Please point the camera at the object, place the mouse on the viewfinder pop-up window, click the
Son the keyboard to acquire the current images, and acquire a certain number of images as needed. - After the image is acquired, click the
Qon the keyboard to end the acquisition.
VI. Labelme Annotation Image
- Click the software
Labelme.exeto open the interface, and clickOpen Directoryto select the folder where the acquired images were saved before.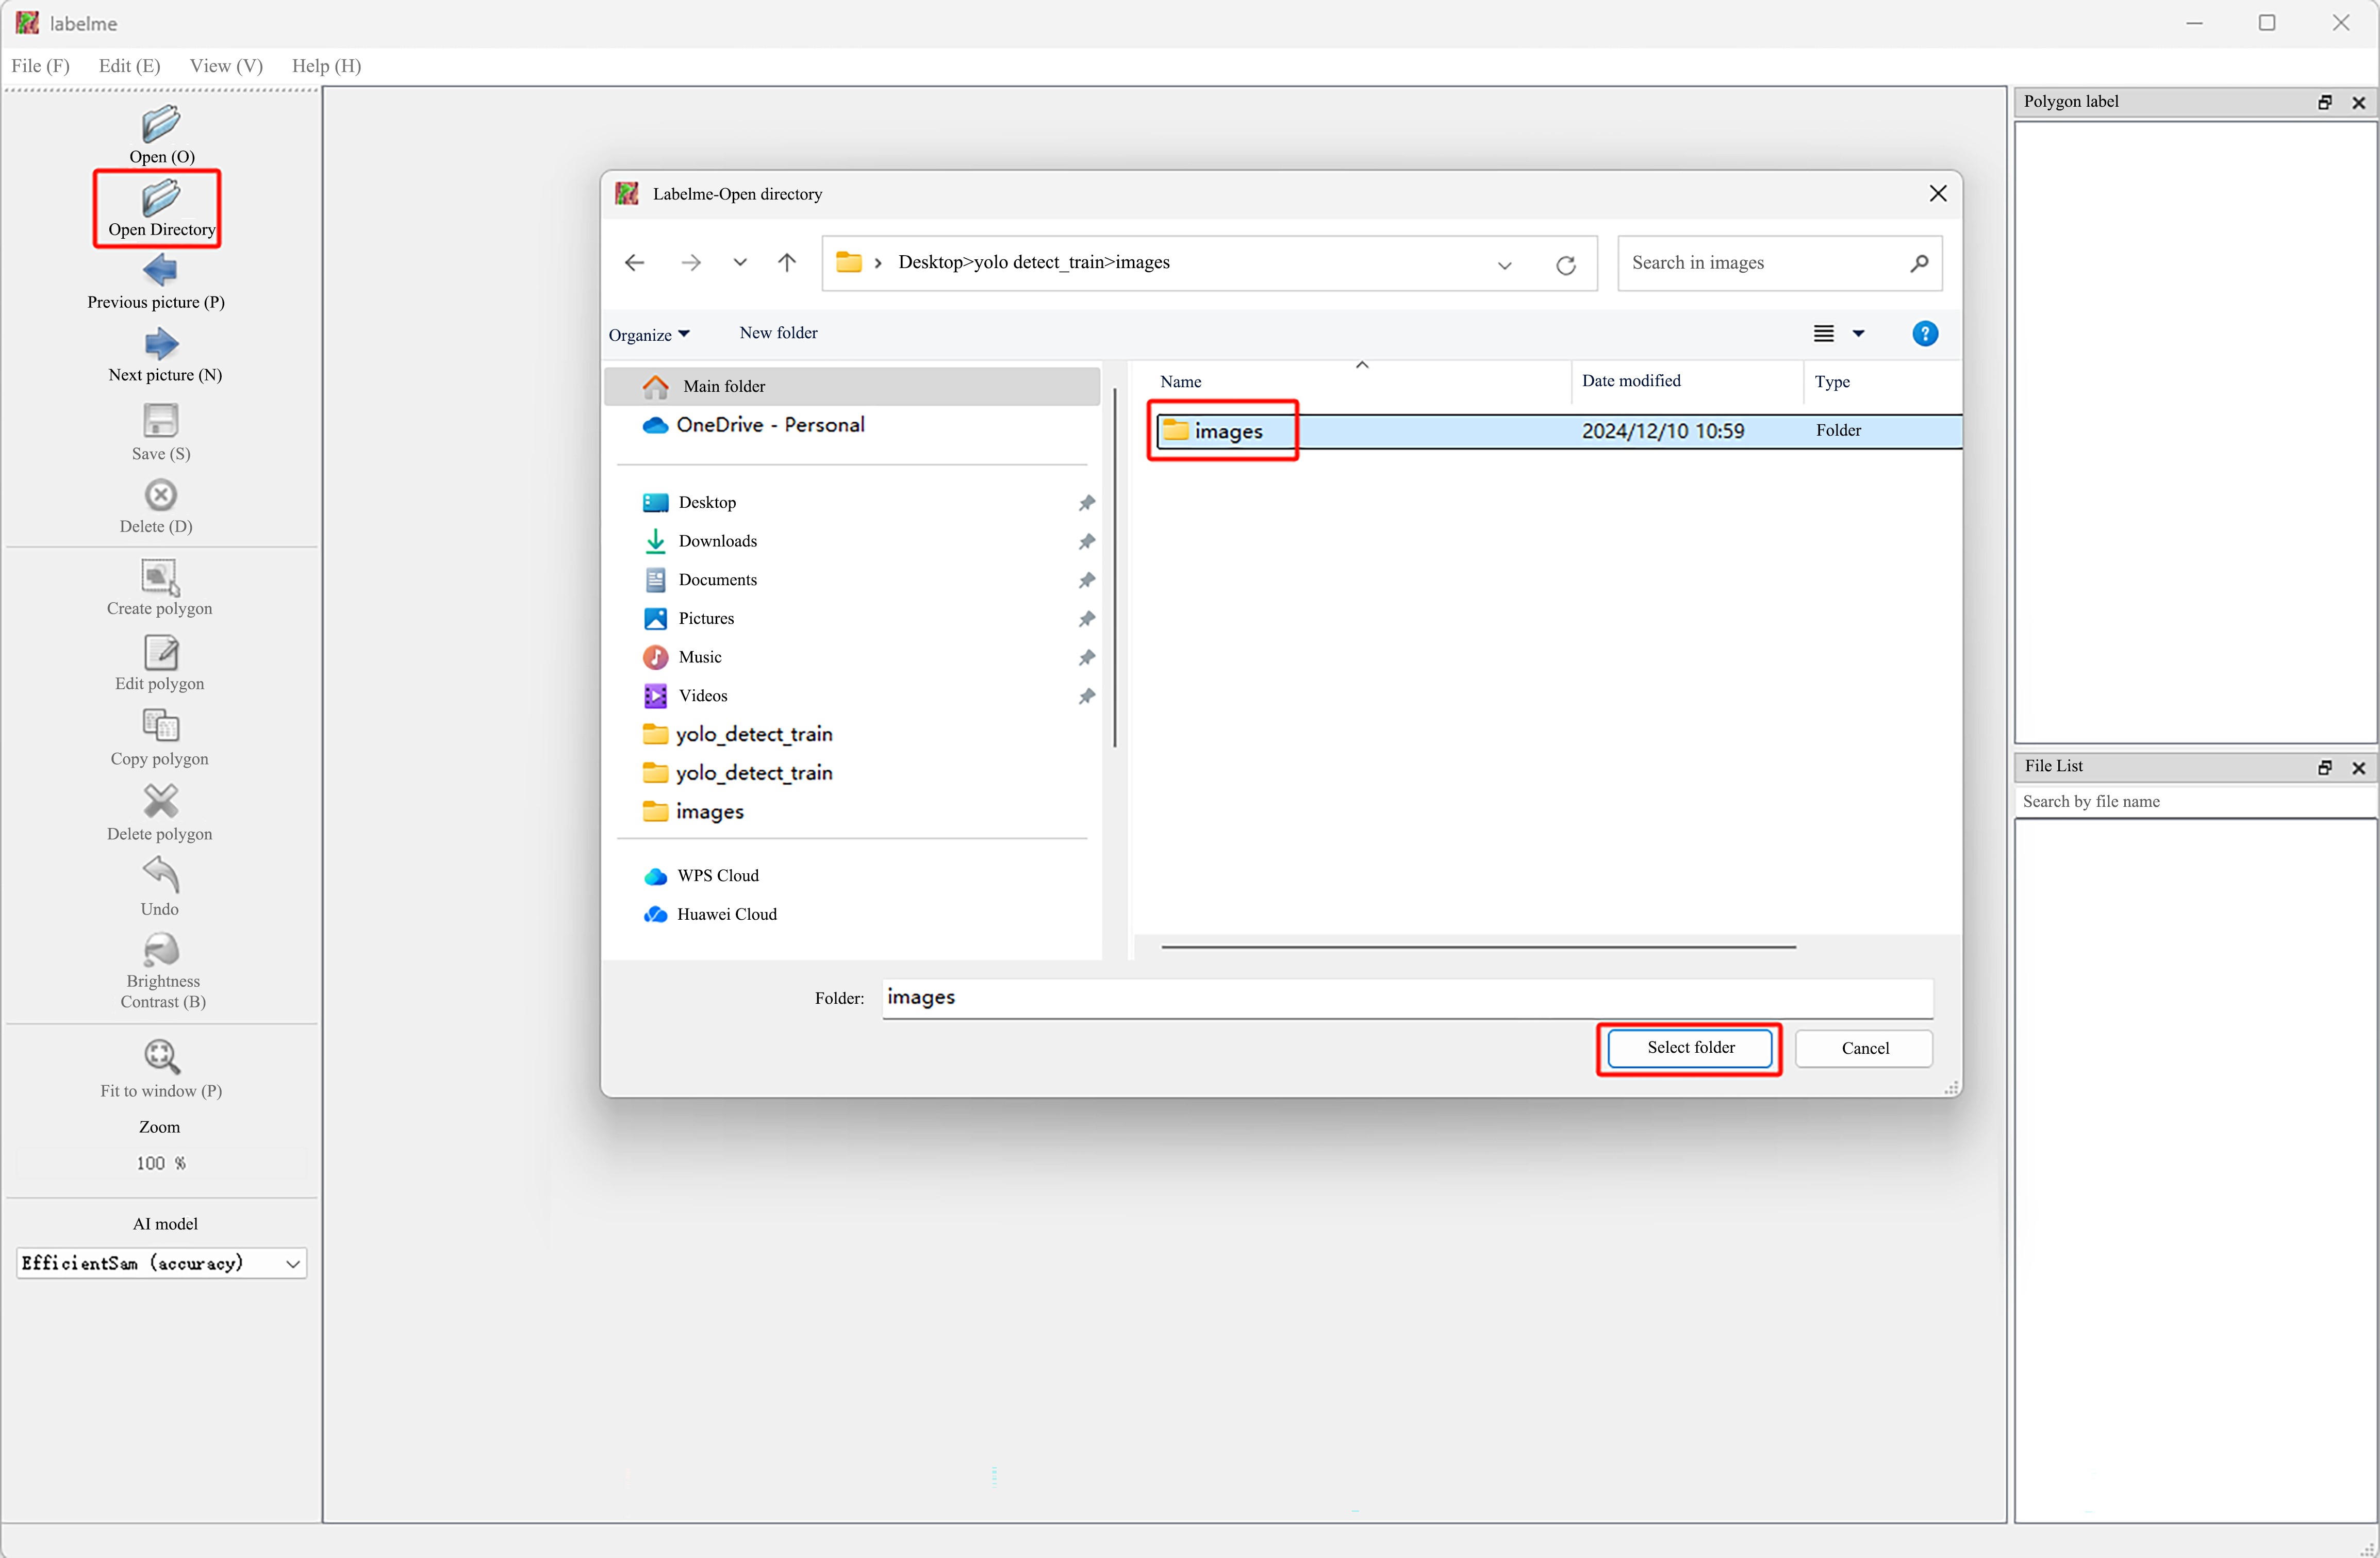
- Click
File>Auto Saveto automatically save the annotation file after setting the annotation image.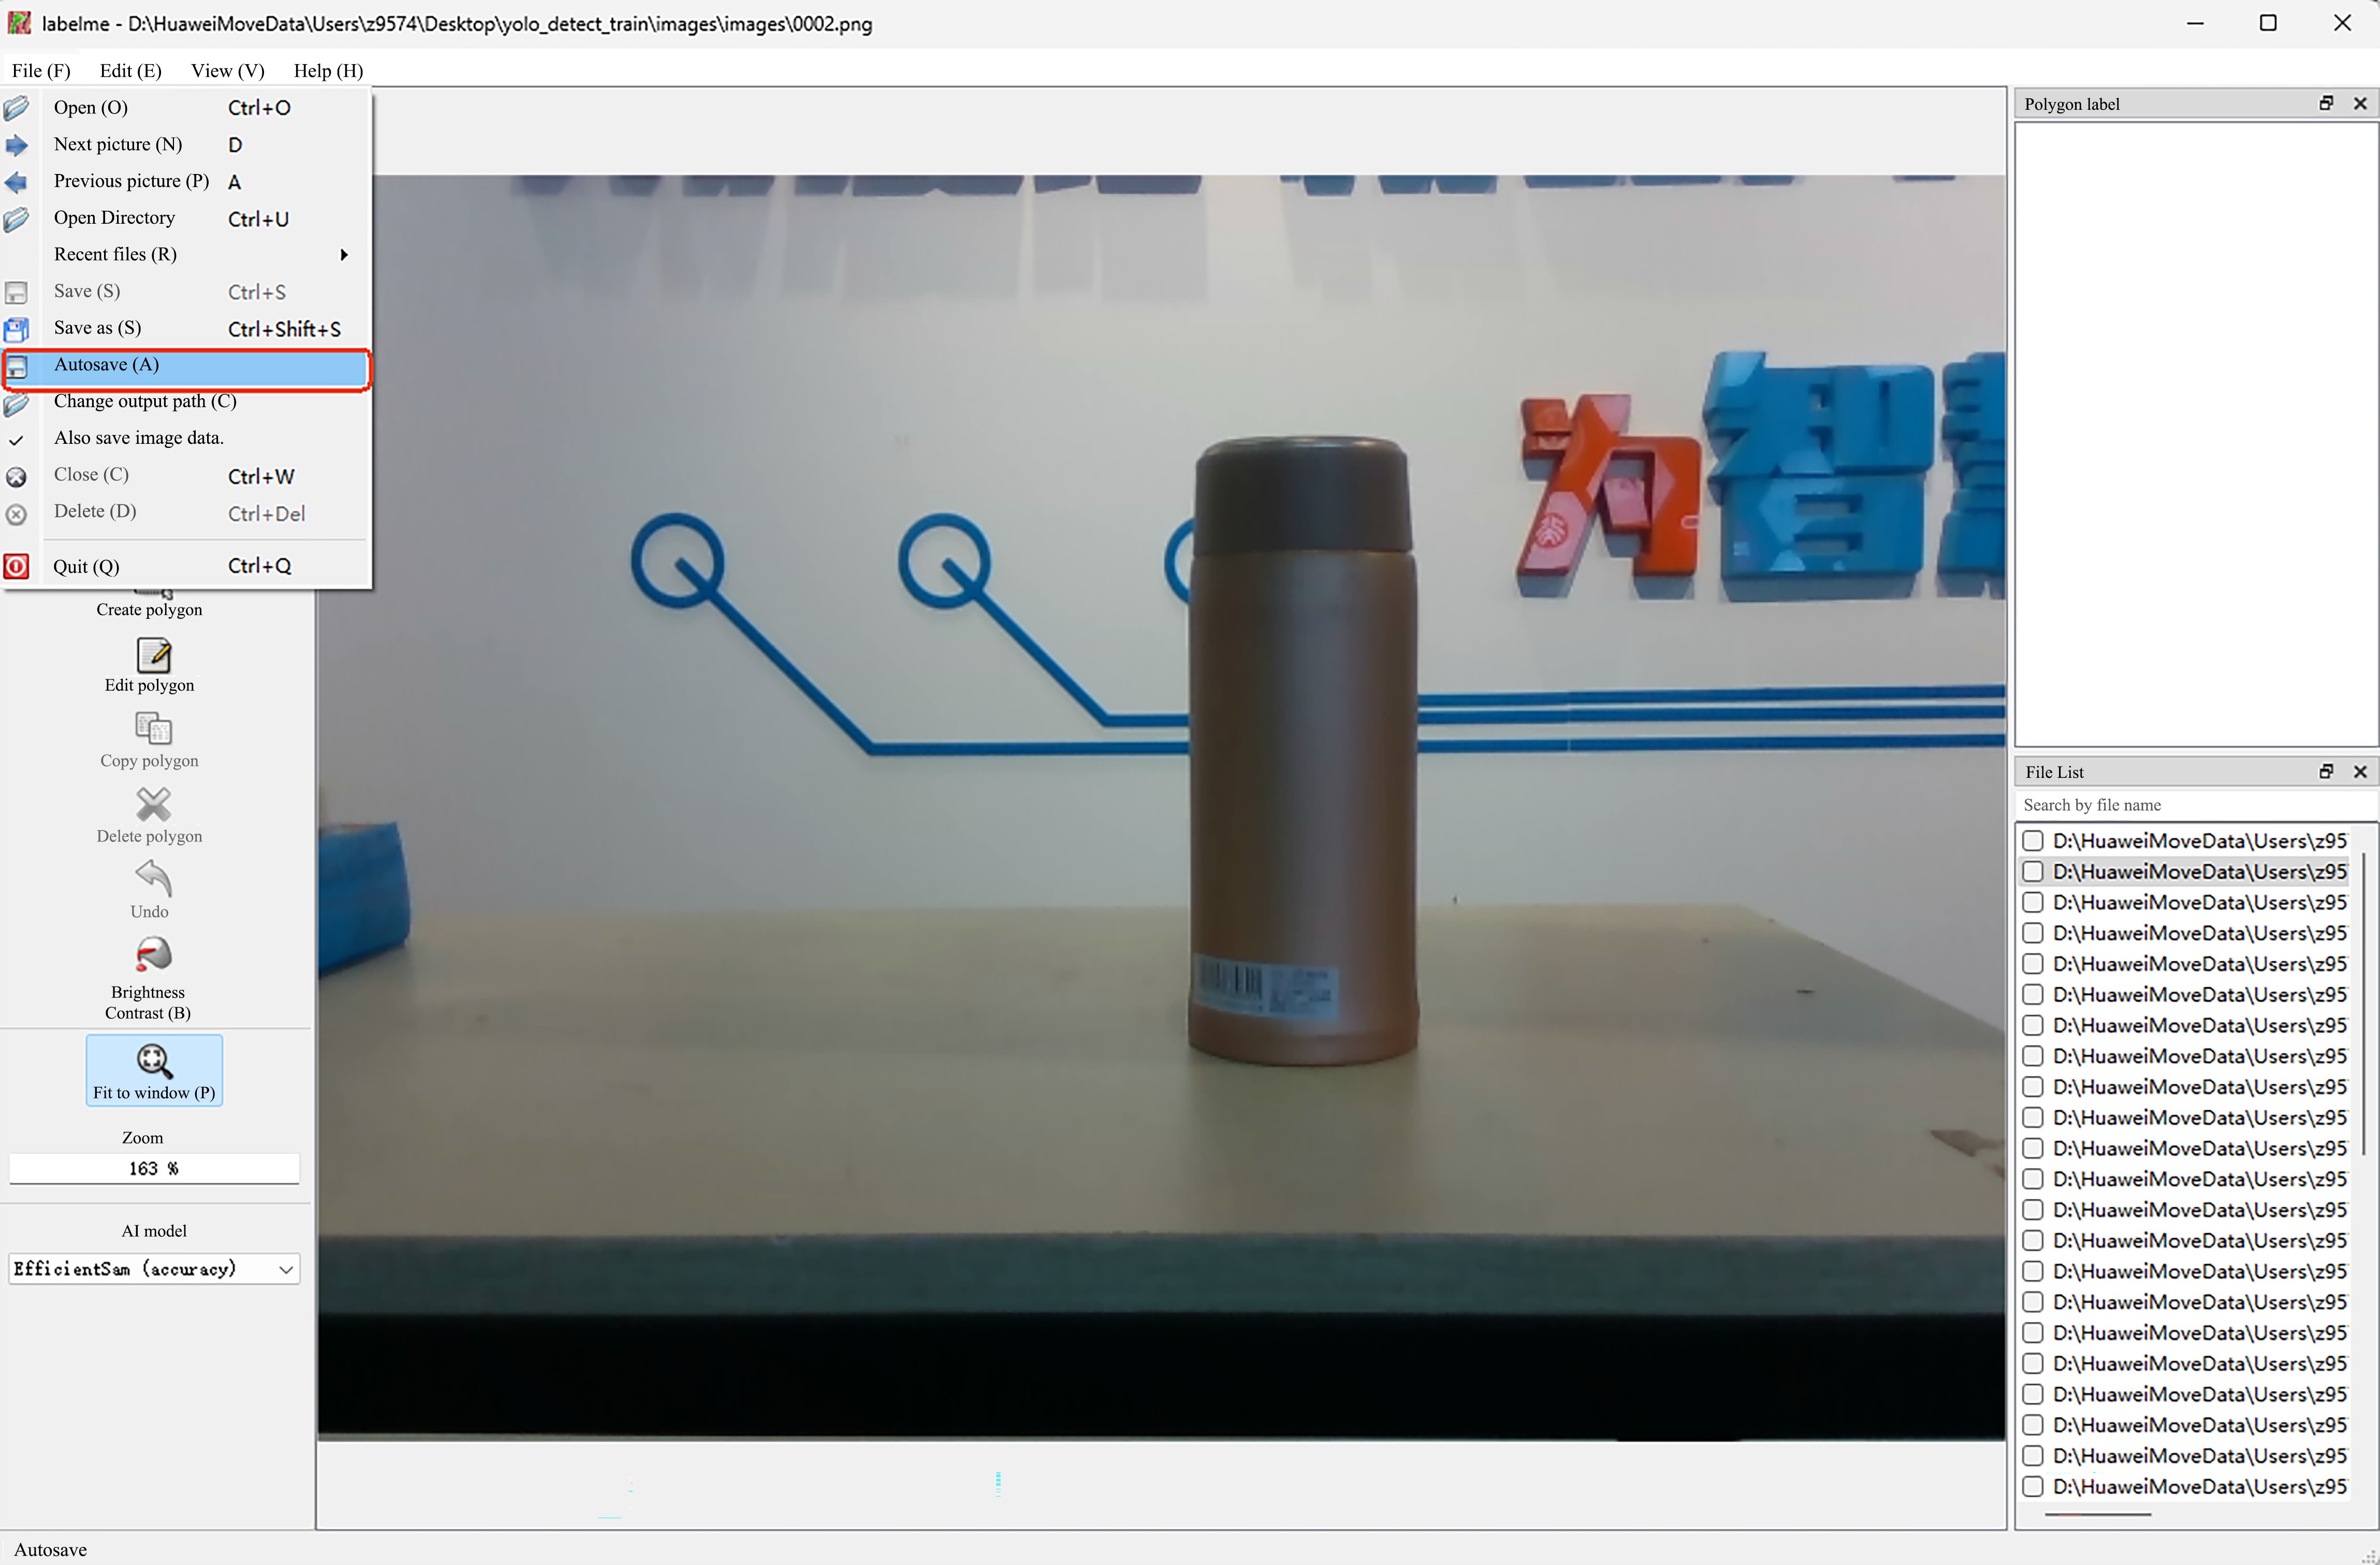
- When annotating the first image, right-click on the image and select
Create Rectanglein the right-click menu.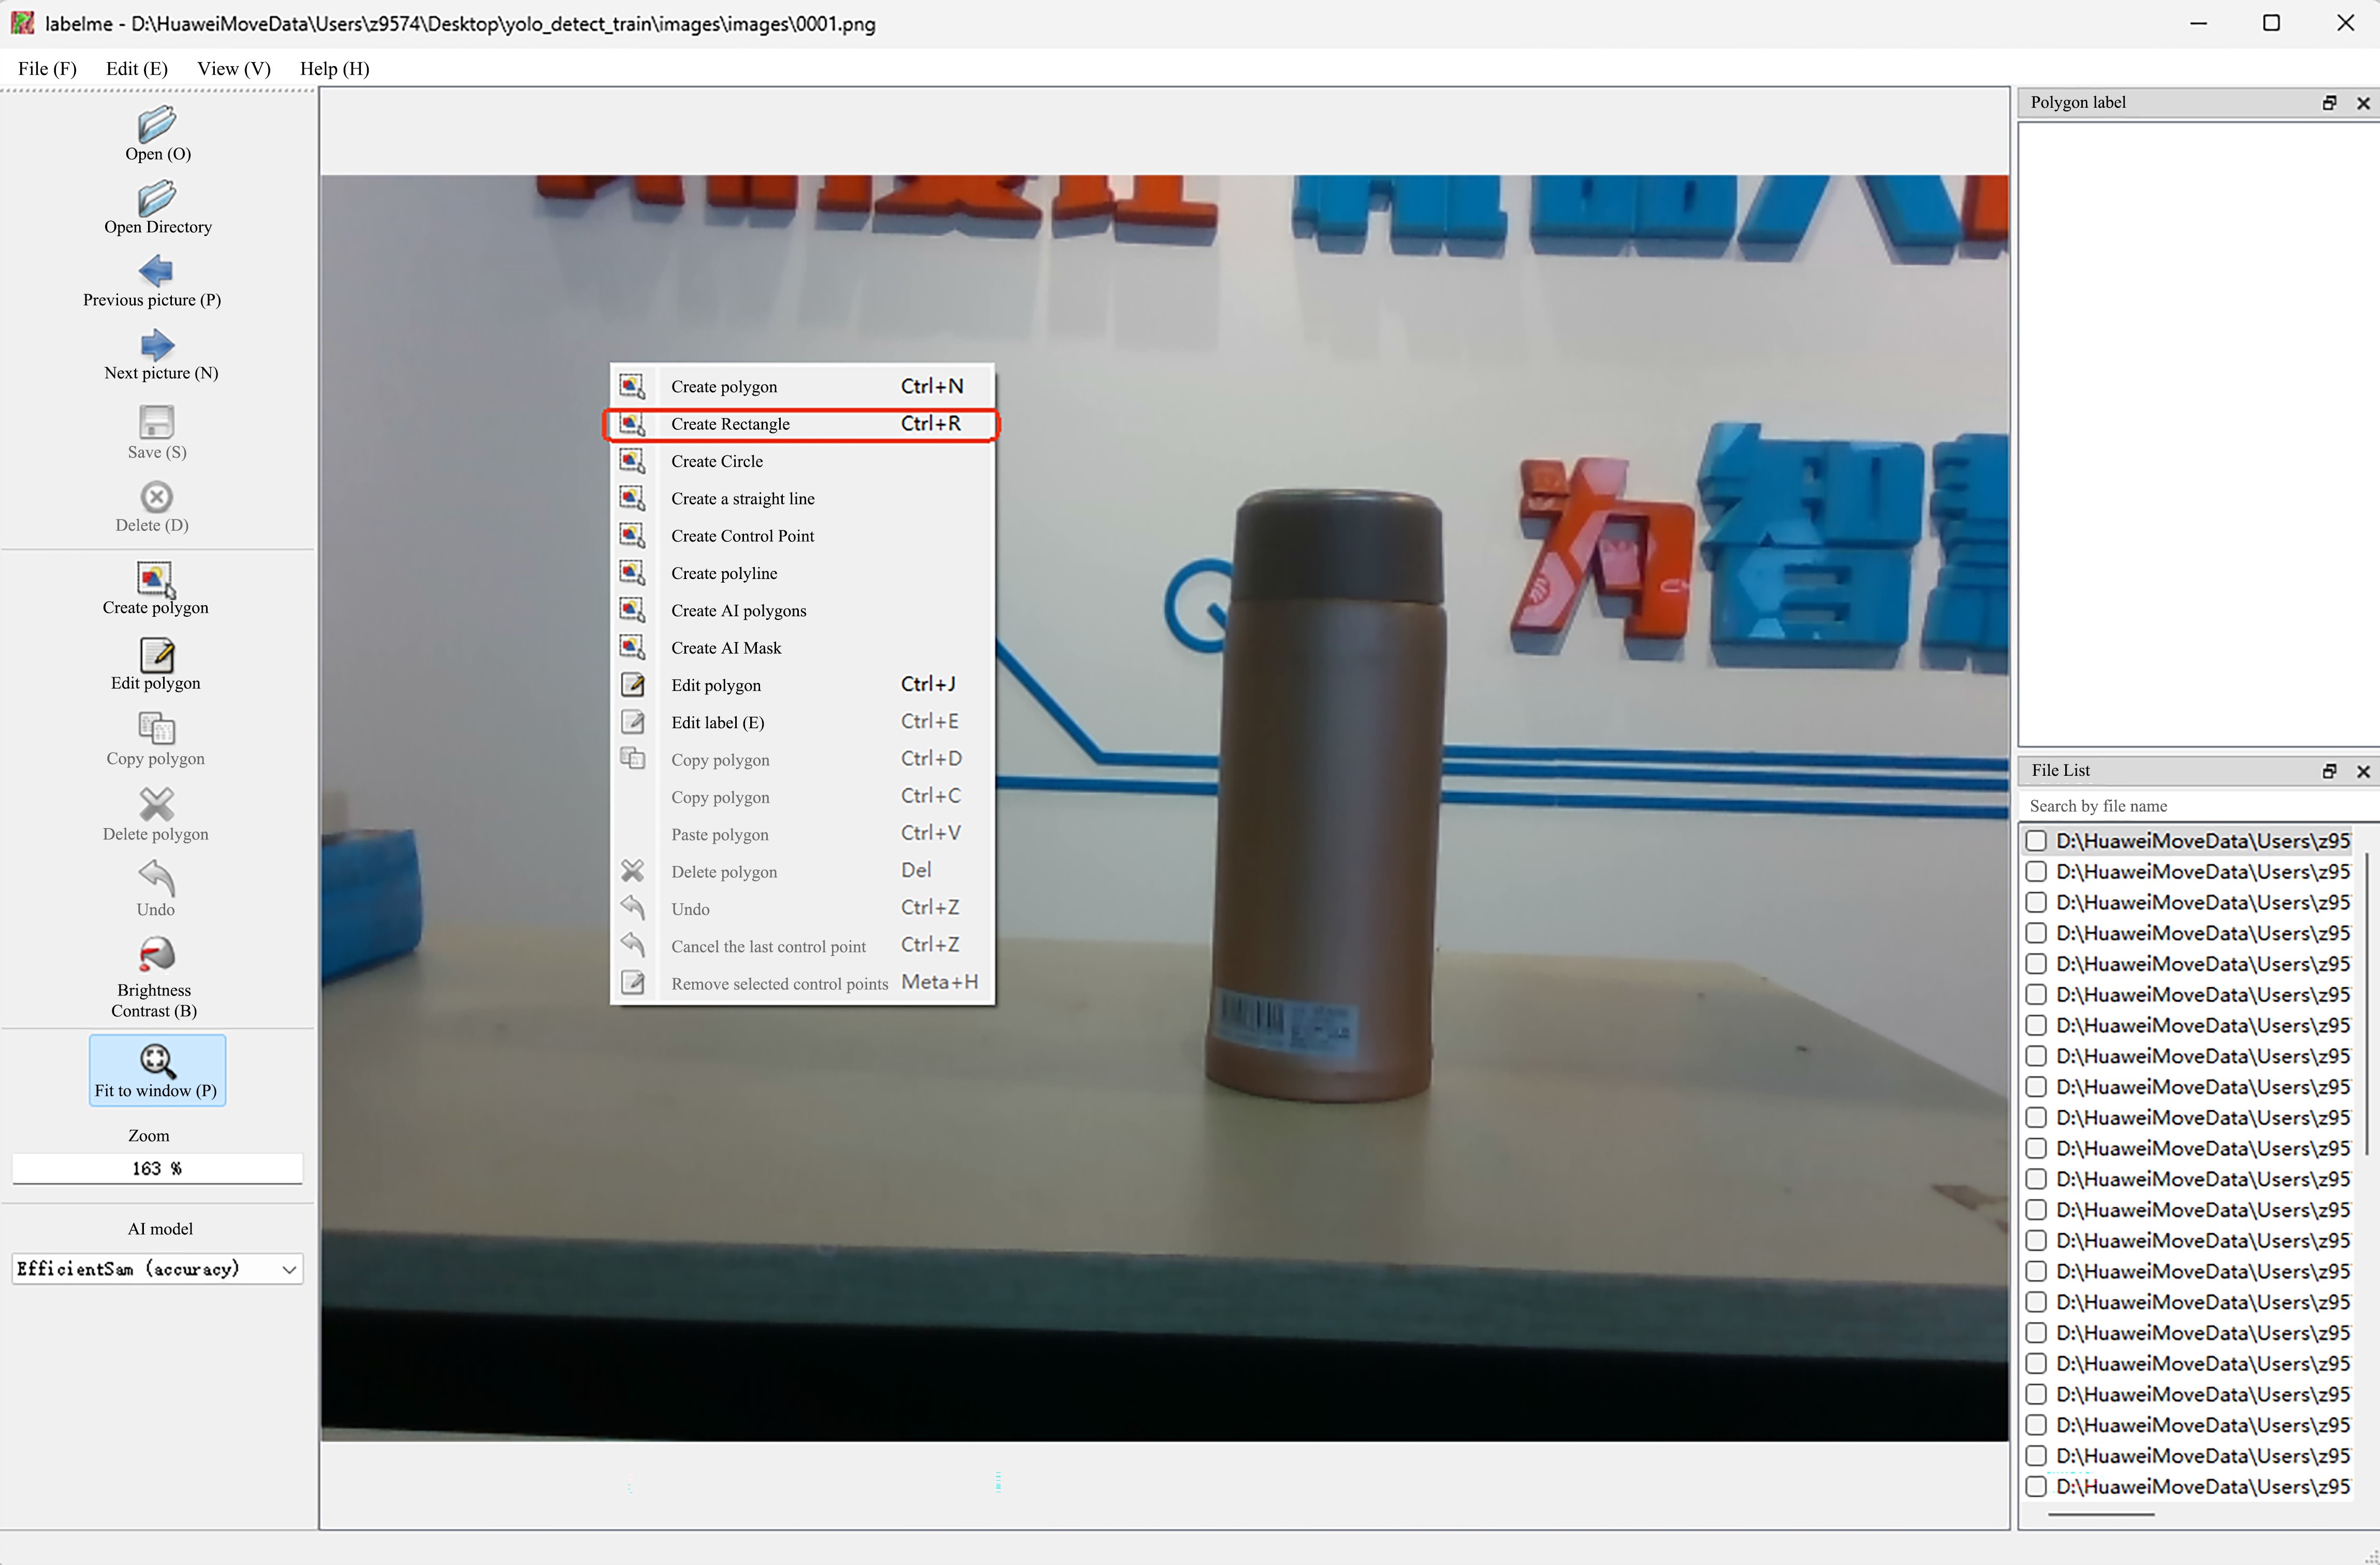
- After enclosing the object with a rectangle, click the left mouse button to customize the object label.
The bounding box should enclose the target object as accurately as possible, avoiding being too tight or too broad. For small targets, special attention should be paid to accuracy.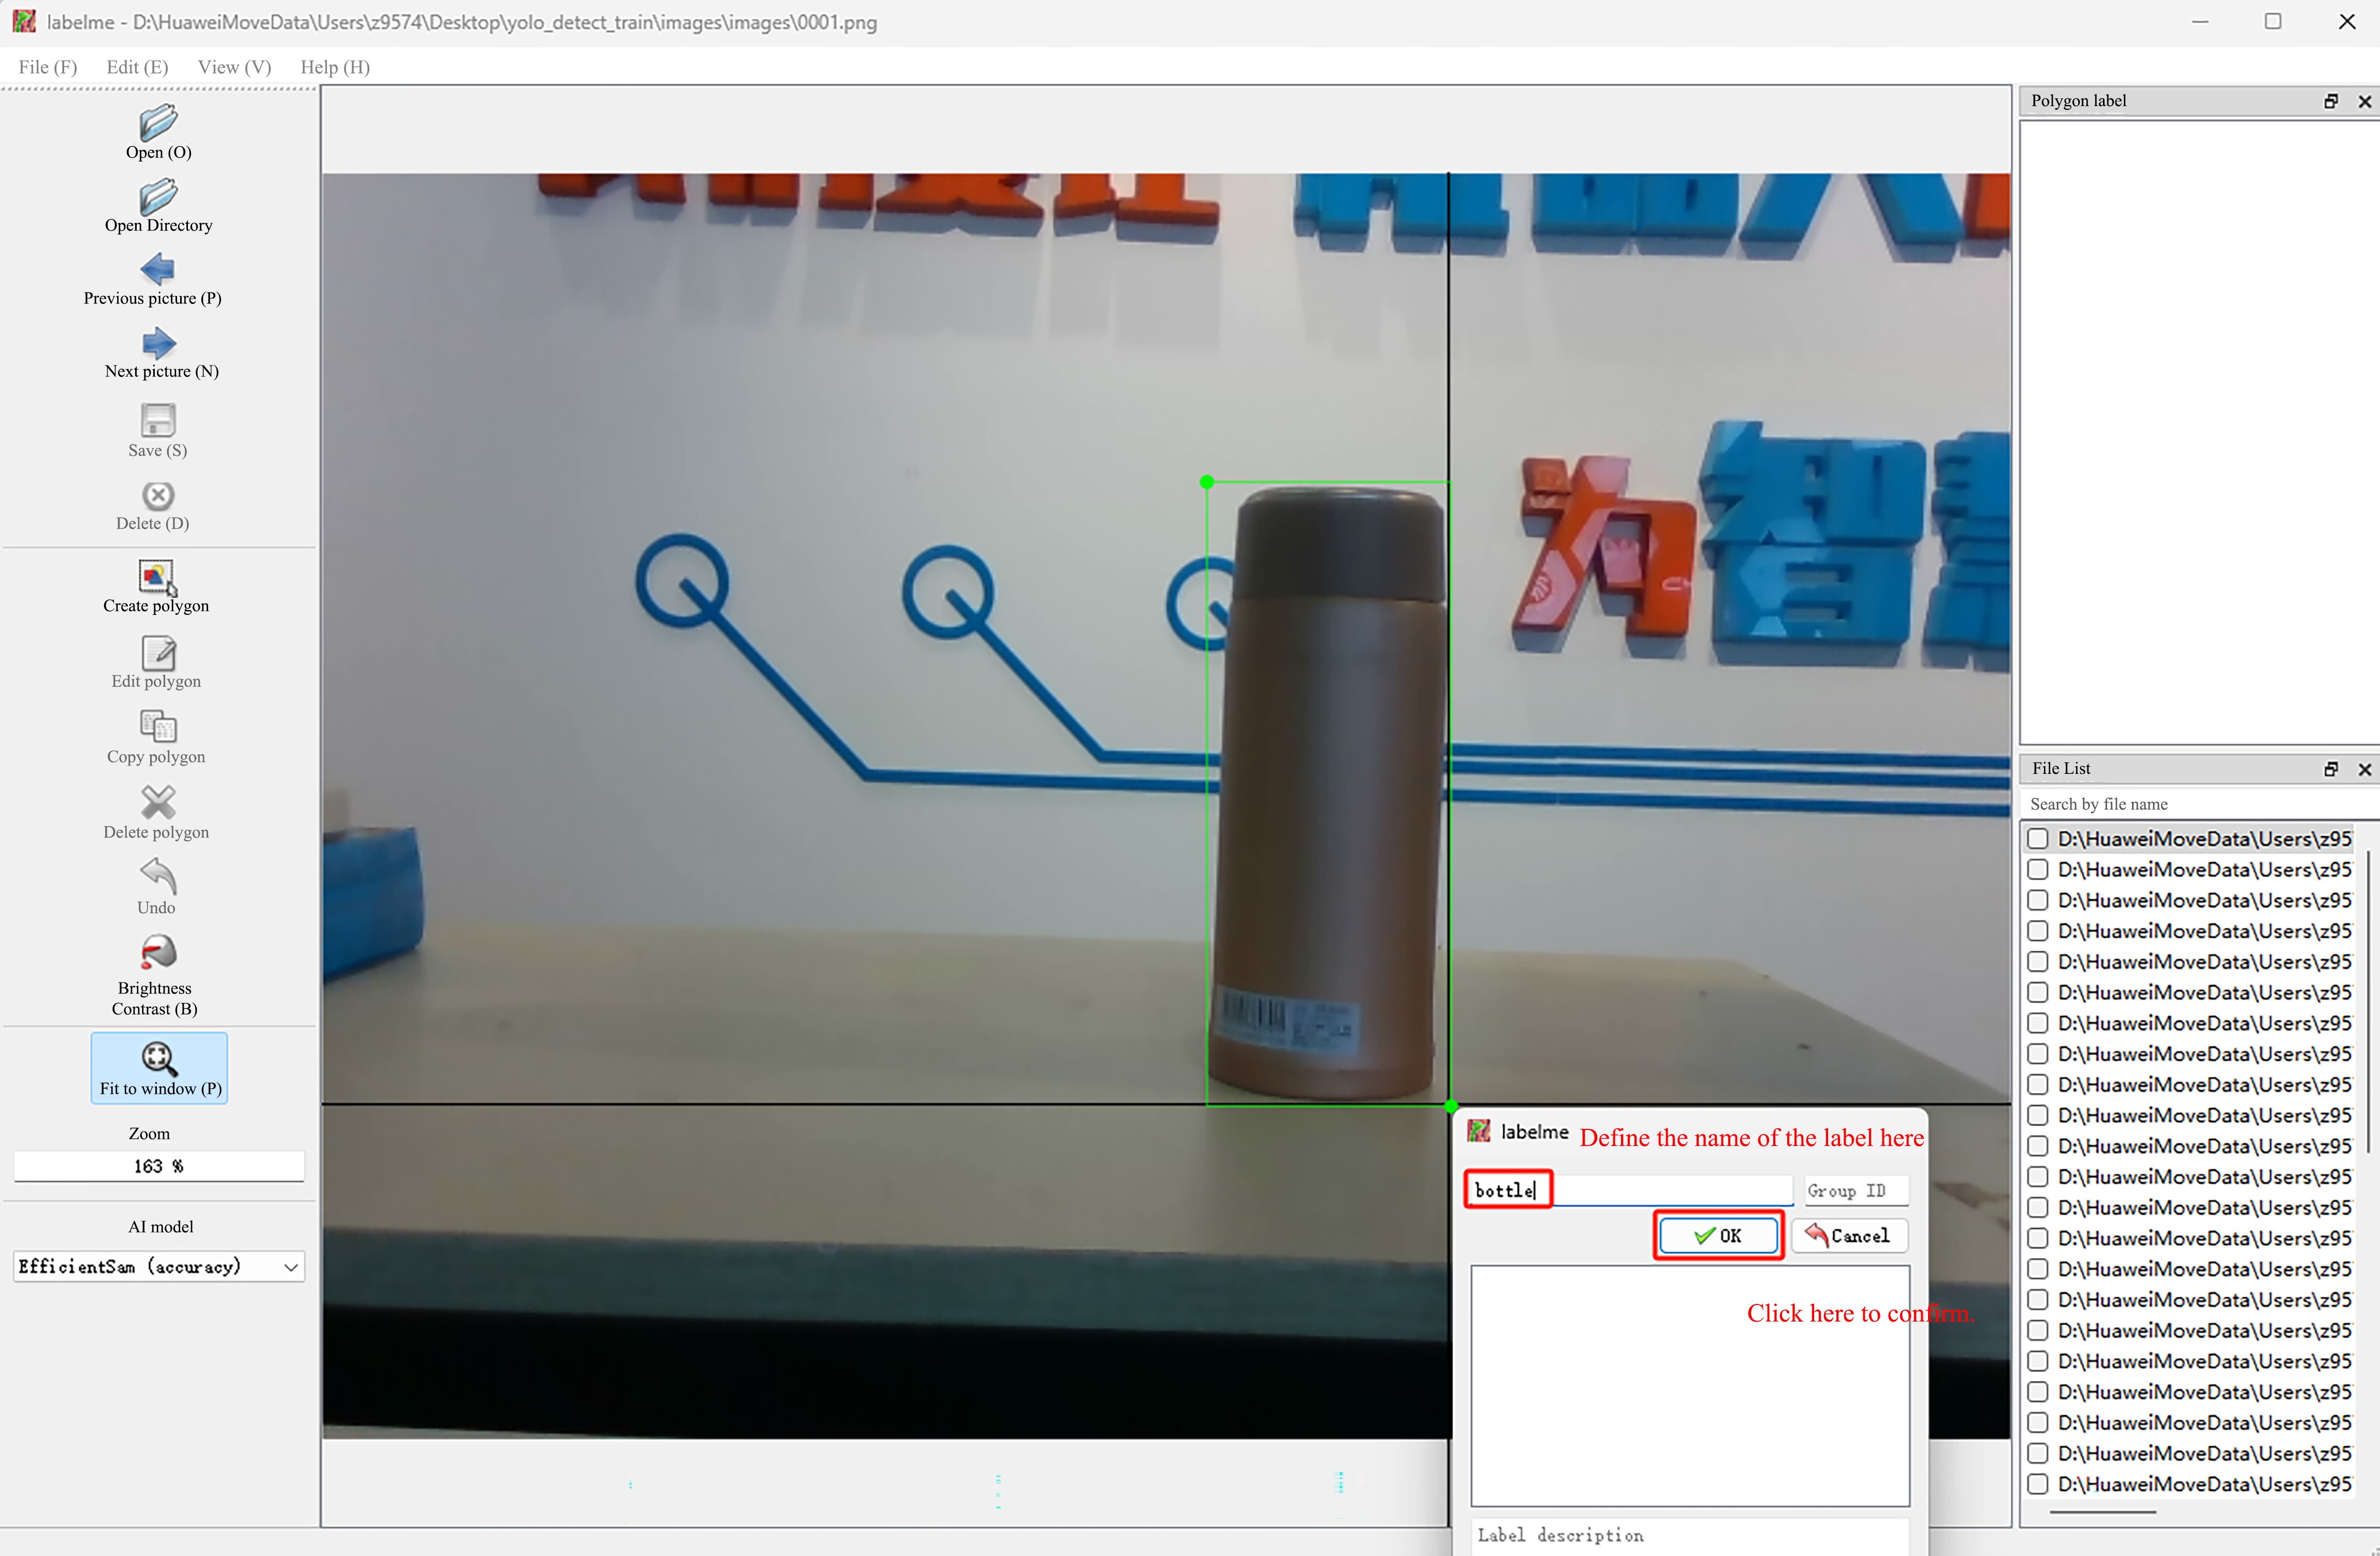
- Click
Next pictureto annotate the next image.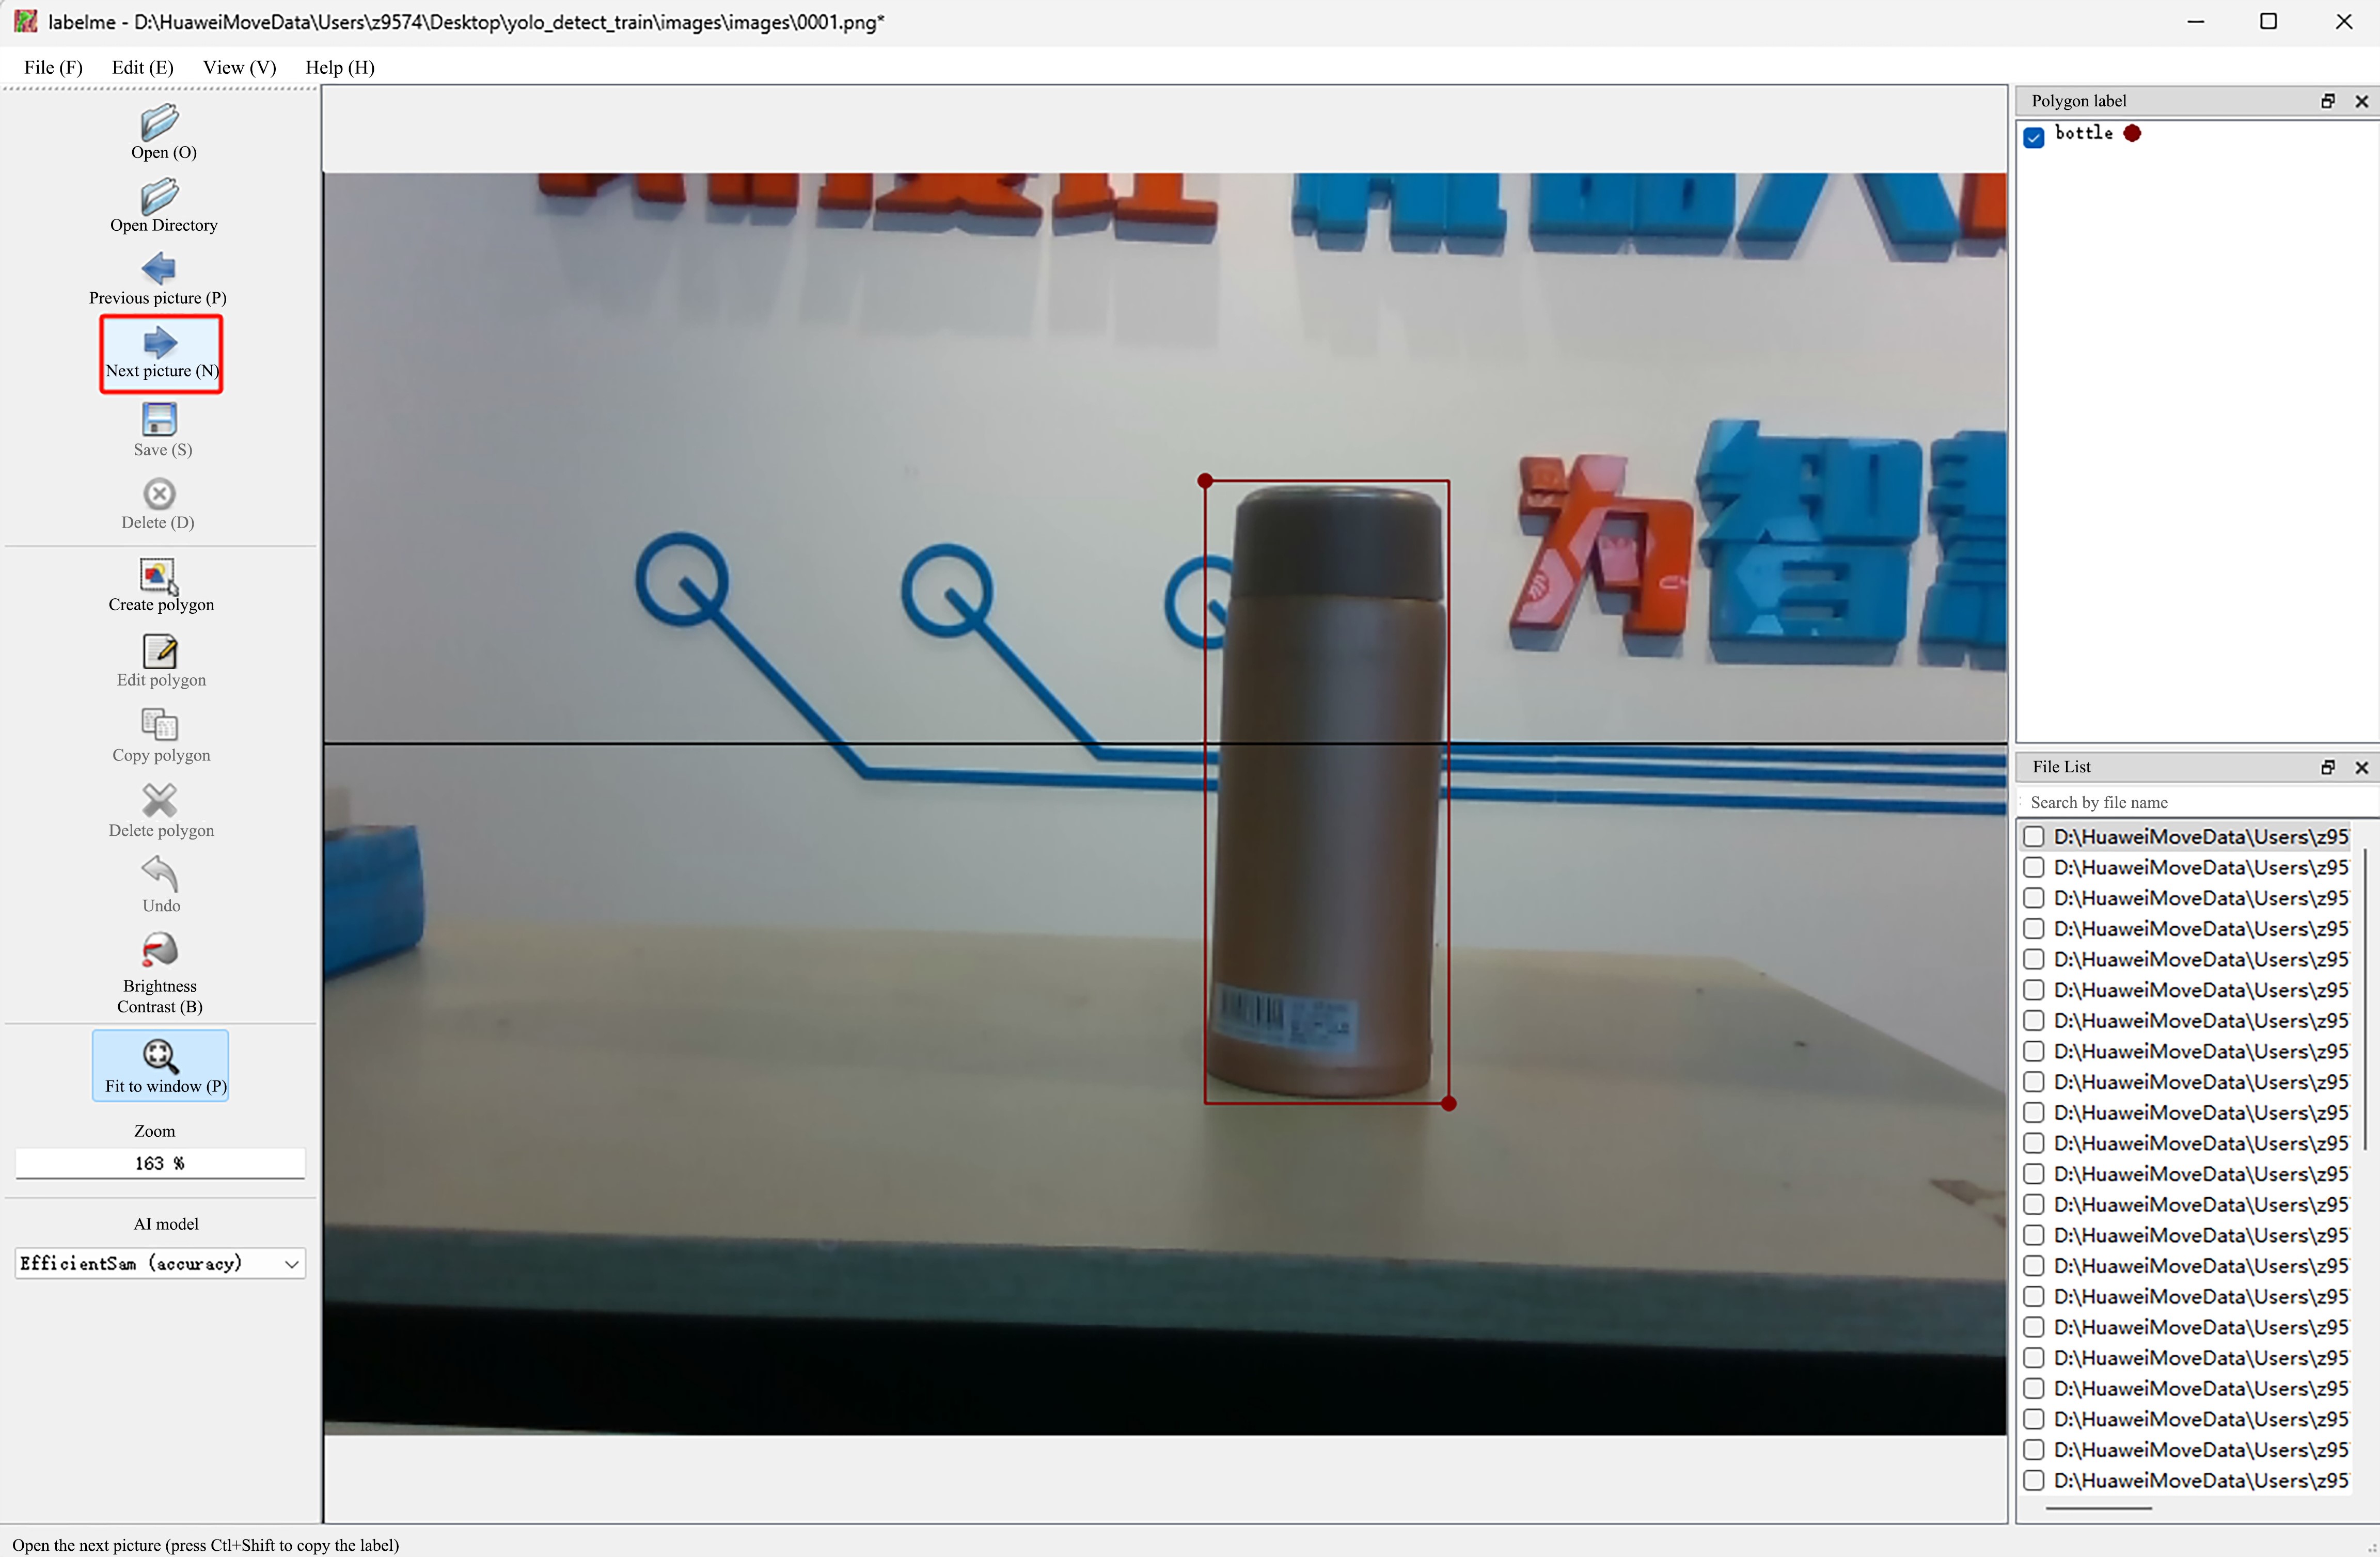
- After annotating an image, a json file with the same name will be generated under the same path as the image. Among all the acquired images, 100-300 images of each category are selected for annotating (make sure to cover all categories). The json contains detailed information such as coordinates and labels of annotated objects. The json file format is as follows:
{
  "version": "5.5.0",
  "flags": {},
  "shapes": [
    {
      "label": "bottle",
      "points": [
        [
          224.51612903225805,
          142.25806451612902
        ],
        [
          316.1290322580645,
          399.0322580645161
        ]
      ],
      "group_id": null,
      "description": "",
      "shape_type": "rectangle",
      "flags": {},
      "mask": null
    }
  ],
  "imagePath": "0002.png",
  "imageData": "iVBORw0KGgoAAAANSUhEUgAAAoAAAAHgCAIAAAC6s0uzAAEAAElEQVR4nLT9S7MtSZYehn3f8oh9zn1kVlZmvbIeXZ1dEIAWSQEDkpIoETCOZISZZjCTmQb6E/wtmmoiDWgmmUw0mWEoARLABggDCHQ3WO",
  "imageHeight": 480,
  "imageWidth": 640
}
TIP
- shapes:It contains specific annotation information and consists of a list. Each element is a dictionary, and each dictionary includes relevant information of one annotation box. For example, "label" refers to the customized label, while "points" represents the annotated points. The value of "points" is associated with "shape_type"; in this case, "shape_type" is set to "rectangle", meaning a rectangular box is determined directly by two diagonal points of the rectangle. Therefore, the "points" only contains information of two points (the coordinates of the top-left and bottom-right corners of the detection box). The coordinates of each point are in the form of (x, y), with the origin of the coordinate system at the top-left corner of the image. The positive direction of the y-axis is downward from the origin, and the positive direction of the x-axis is to the right from the origin.
- ImagePath: is the file name of the annotated image.
- Shape_type: records the method selected when annotating.
We can train a model with labeled images, use the model to automatically label the remaining unlabeled images, and then train a final model with all the images and annotations. This method can reduce the workload of manual annotation. When there are multiple objects to be annotated in a acquired image, the workload of manually annotating all images is extremely large and the efficiency is extremely low.
For example: 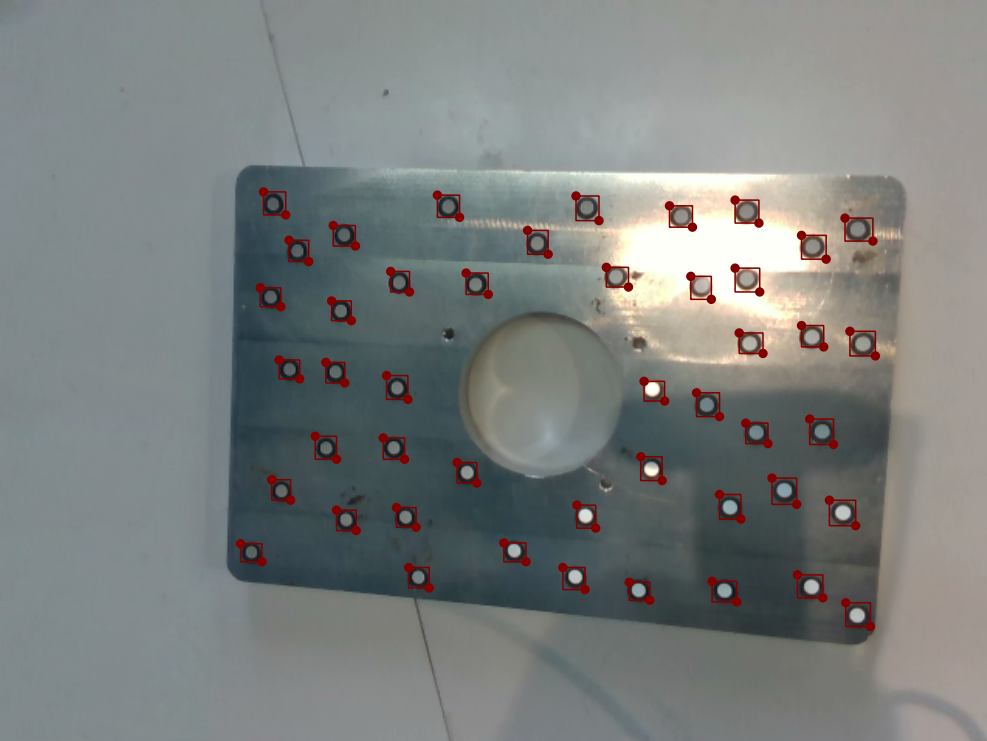
VII. Detecting Model Training (Preliminary Training)
Cut File
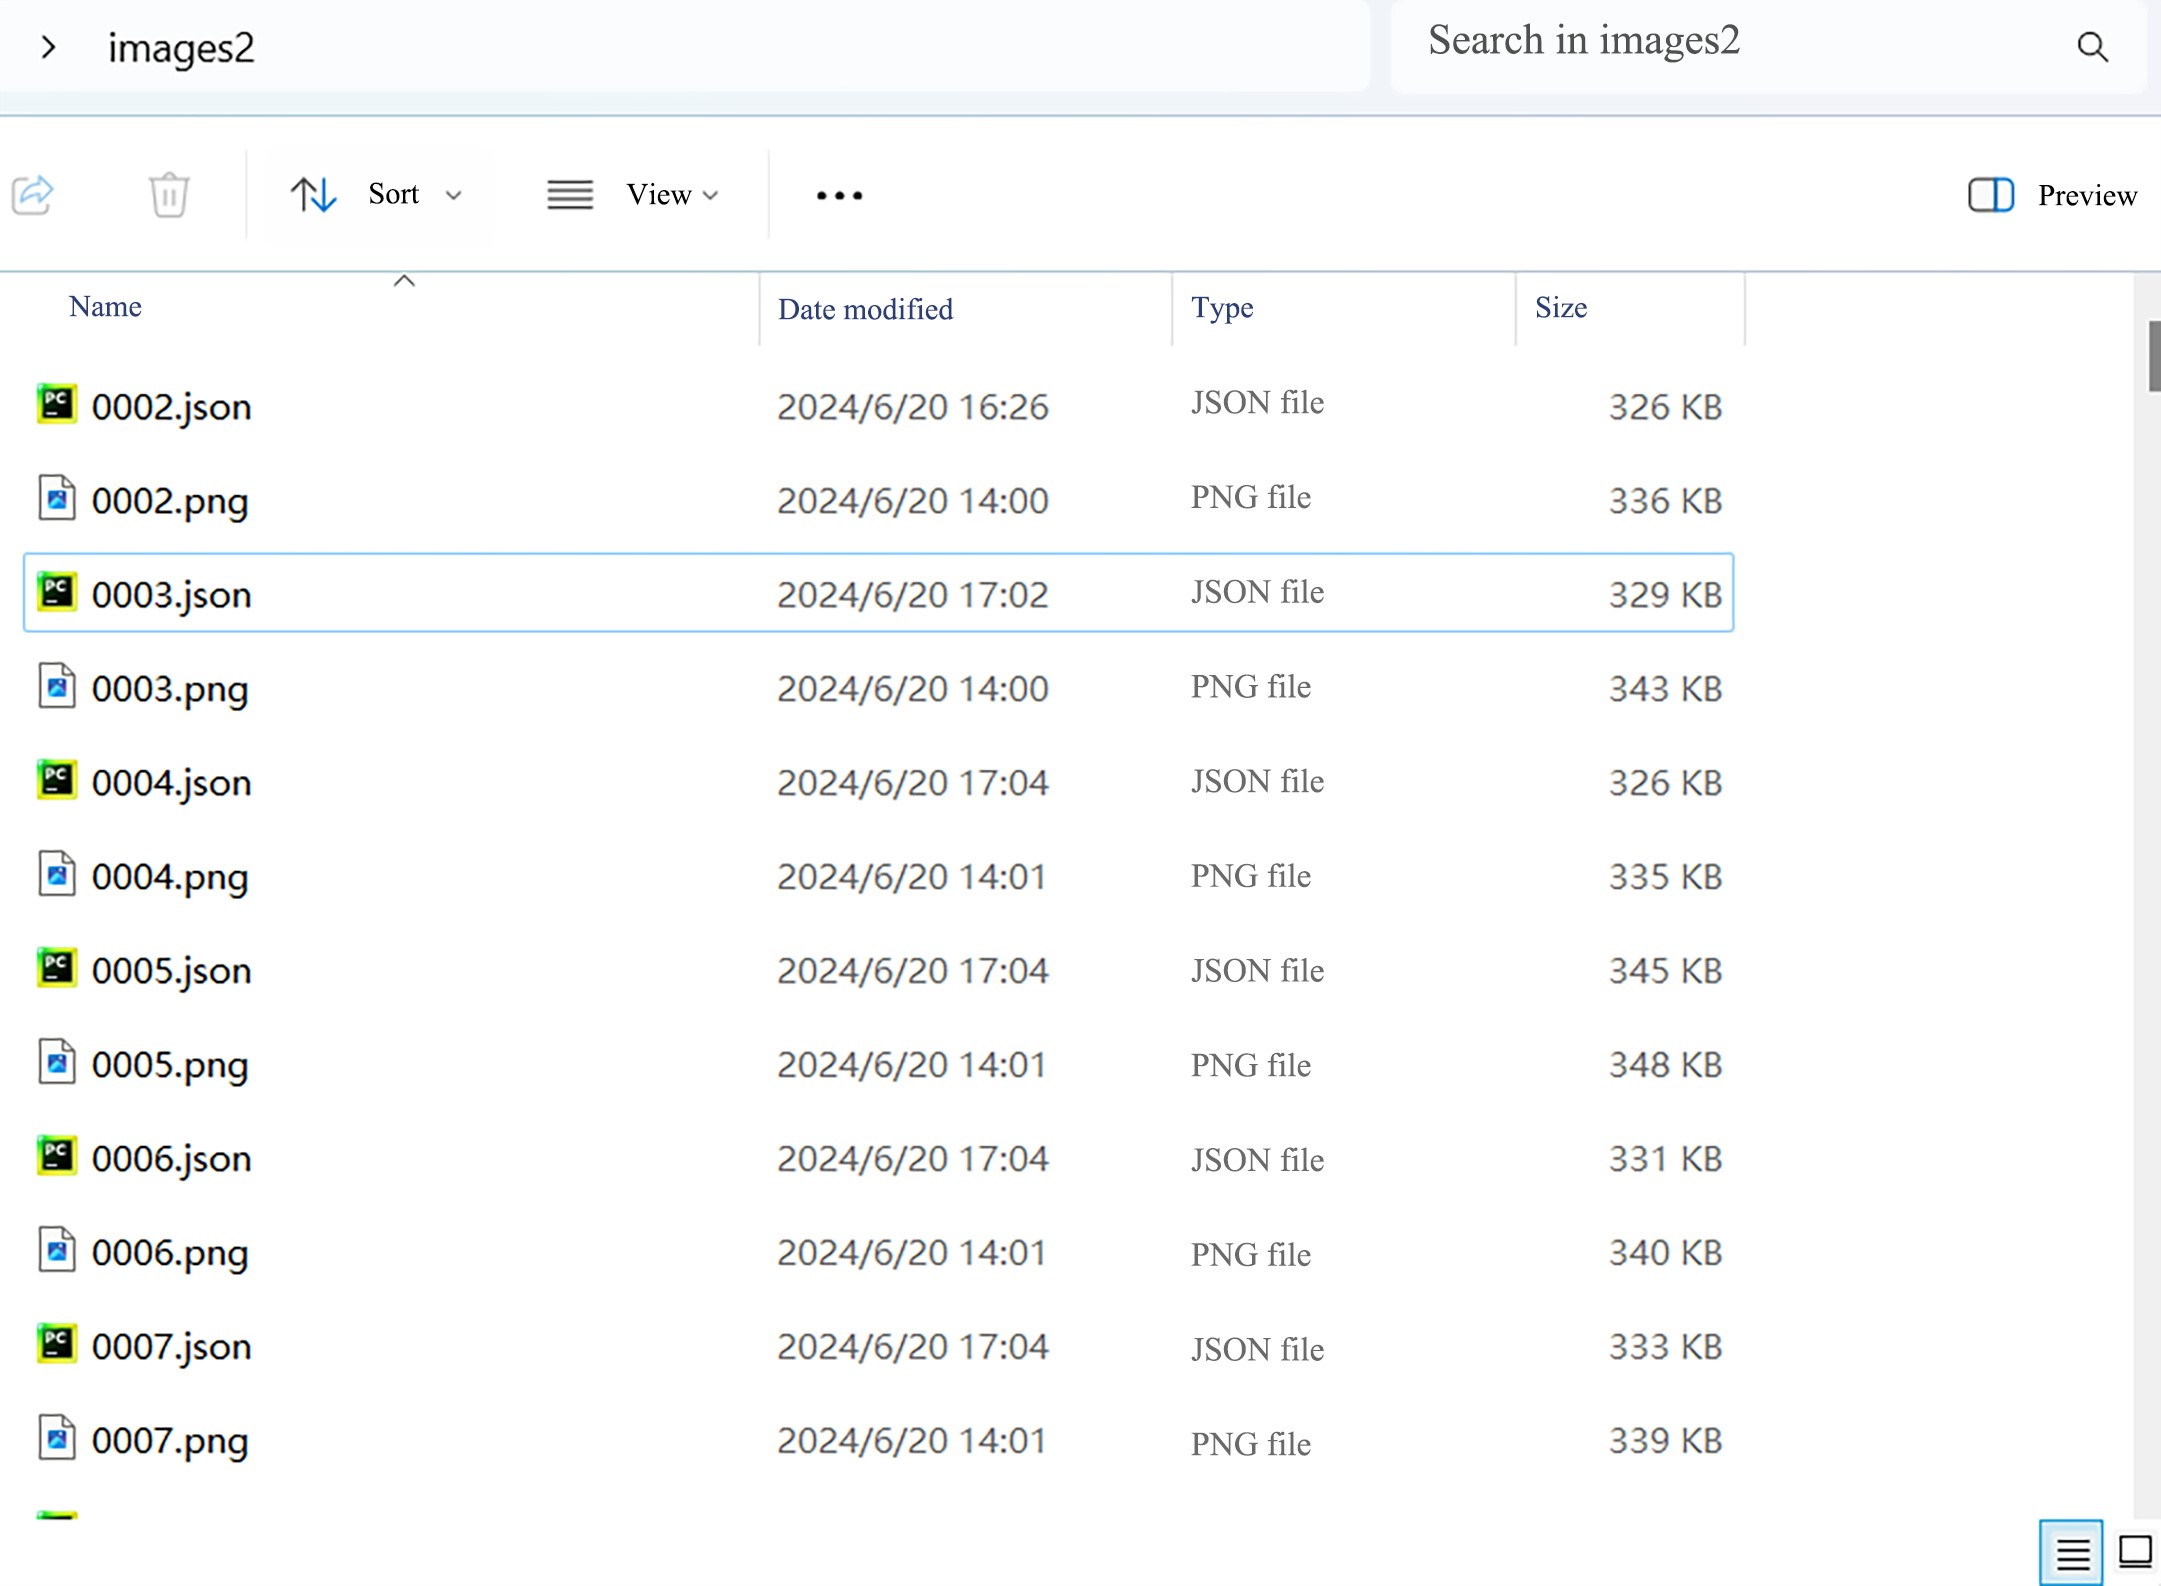
Cut the completed annotated images and annotation files into the newly created folder images2. Note that the file generated by the annotation is a json file, as shown in the figure below.
YOLO Model
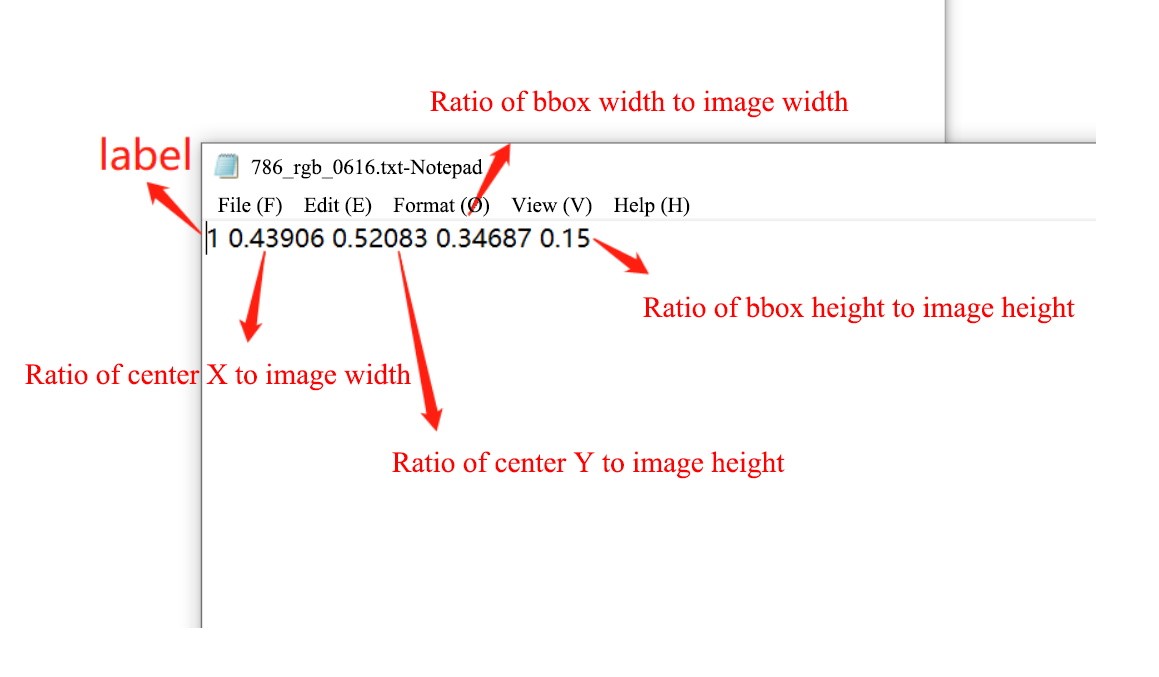
The YOLO model uses an annotation format based on TXT files, each of which contains information corresponding to the target in the image, including the target category and location in the image. The format of the YOLO annotation file is as follows:
<class> <x_center> <y_center> <width> <height>TIP
<class>Indicates the index of the target category (starting from 0).<x_center>,<y_center>respectively represent the proportional values of the center point of the target box relative to the horizontal and vertical coordinates of the top-left corner of the image (coordinate origin), with a value range of [0, 1] (note: there may be a typo in the original "0,10,1"; the common proportional range in target detection is 0 to 1, so it is corrected here for accuracy). For example, if the image has a width of 640 pixels and a height of 480 pixels, and the center point occupies 1/4 of the image width in the horizontal direction and 1/3 of the image height in the vertical direction, then<x_center>is 0.25 and<y_center>is 0.33.<width>,<height>respectively represent the proportional values of the target box's width and height relative to the entire image's width and height, with the value range also being 0, 10, 1. For example, if the target box width occupies 1/2 of the image width and the height occupies 1/4 of the image height,<width>is 0.5 and<height>0.25.
Conversion Format
Convert the annotation file (json format) generated by Labelme into the annotation file (txt format) required by YOLO, and divide it into training set, validation set and test set according to training requirements.
Use the following script to implement the functions of converting Labelme annotation files (json format) into YOLO annotation files (txt format) and converting and dividing data sets.
Final.py is the script file downloaded in the Related Downloads.
The script file code example is as follows:
# -*- coding: utf-8 -*-

import os
import numpy as np
import json
from glob import glob
import cv2
import shutil
import yaml
from sklearn.model_selection import train_test_split
from tqdm import tqdm
from PIL import Image


'''
Unify Image Formats
'''
def change_image_format(label_path, suffix='.png'):
    """
    Unify the format of all images in the current folder,如'.jpg'
    :param suffix: Suffix of the image file
    :param label_path:Current file path
    :return:
    """
    externs = ['png', 'jpg', 'JPEG', 'BMP', 'bmp']
    files = list()
    # Get all images with extensions in externs
    for extern in externs:
        files.extend(glob(label_path + "\\*." + extern))
    # Traverse all images and convert their formats
    for index,file in enumerate(tqdm(files)):
        name = ''.join(file.split('.')[:-1])
        file_suffix = file.split('.')[-1]
        if file_suffix != suffix.split('.')[-1]:
            # Rename to JPG
            new_name = name + suffix
            # Read the image
            image = Image.open(file)
            image = cv2.cvtColor(np.asarray(image), cv2.COLOR_RGB2BGR)
            #  Save the image as JPG format
            cv2.imwrite(new_name, image)
            # Delete the old image
            os.remove(file)


'''
Read All JSON Files to Get All Classes
'''
def get_all_class(file_list, label_path):
    """
    Get all classes of the current dataset from JSON files
    :param file_list:All file names in the current path
    :param label_path:Current file path
    :return:
    """
    # Initialize the class list
    classes = list()
    # Traverse all JSON files, read the label values in 'shapes', and add them to classes
    for filename in tqdm(file_list):
        json_path = os.path.join(label_path, filename + '.json')
        json_file = json.load(open(json_path, "r", encoding="utf-8"))
        for item in json_file["shapes"]:
            label_class = item['label']
            if label_class not in classes:
                classes.append(label_class)
    print('read file done')
    return classes


'''
Split into Training Set, Validation Set, and Test Set
'''
def split_dataset(label_path, test_size=0.3, isUseTest=False, useNumpyShuffle=False):
    """
    Split files into training set, test set, and validation set
    :param useNumpyShuffle: Use numpy method to split the dataset
    :param test_size: Proportion of the test set or validation set
    :param isUseTest: Whether to use a test set, default is False
    :param label_path:Current file path
    :return:
    """
    # Get all JSON files
    files = glob(label_path + "\\*.json")
    # Get the names of all JSON files
    files = [i.replace("\\", "/").split("/")[-1].split(".json")[0] for i in files]

    if useNumpyShuffle:
        file_length = len(files)
        index = np.arange(file_length)
        np.random.seed(32)
        np.random.shuffle(index) # Random split

        test_files = None
        # Whether there is a test set
        if isUseTest:
            trainval_files, test_files = np.array(files)[index[:int(file_length * (1 - test_size))]], np.array(files)[
                index[int(file_length * (1 - test_size)):]]
        else:
            trainval_files = files
        # Split into training set and validation set
        train_files, val_files = np.array(trainval_files)[index[:int(len(trainval_files) * (1 - test_size))]], \
                                 np.array(trainval_files)[index[int(len(trainval_files) * (1 - test_size)):]]
    else:
        test_files = None
        if isUseTest:
            trainval_files, test_files = train_test_split(files, test_size=test_size, random_state=55)
        else:
            trainval_files = files

        # Randomly allocate JSON file names (without suffix) at a ratio of (1-test_size)/test_size
        train_files, val_files = train_test_split(trainval_files, test_size=test_size, random_state=55)

    return train_files, val_files, test_files, files


'''
Generate Folders for YOLOv8 Training, Validation, and Test Sets
'''
def create_save_file(ROOT_DIR,isUseTest = False):
    print('step6:Generate folders for YOLOv8 training, validation, and test sets')

    # Generate training set
    train_image = os.path.join(ROOT_DIR, 'images','train')
    if not os.path.exists(train_image):
        os.makedirs(train_image)
    train_label = os.path.join(ROOT_DIR, 'labels','train')
    if not os.path.exists(train_label):
        os.makedirs(train_label)
    # Generate validation set
    val_image = os.path.join(ROOT_DIR, 'images', 'val')
    if not os.path.exists(val_image):
        os.makedirs(val_image)
    val_label = os.path.join(ROOT_DIR, 'labels', 'val')
    if not os.path.exists(val_label):
        os.makedirs(val_label)
    # Generate test set
    if isUseTest:
        test_image = os.path.join(ROOT_DIR, 'images', 'test')
        if not os.path.exists(test_image):
            os.makedirs(test_image)
        test_label = os.path.join(ROOT_DIR, 'labels', 'test')
        if not os.path.exists(test_label):
            os.makedirs(test_label)
    else:
        test_image, test_label = None,None

    return train_image, train_label, val_image, val_label, test_image, test_label


'''
Conversion: Return the Midpoint, Height, and Width of the Bounding Box Based on Image Size
'''

def convert(img_size, box):

    dw = 1. / (img_size[0])
    dh = 1. / (img_size[1])
    x = (box[0] + box[2]) / 2.0 - 1
    y = (box[1] + box[3]) / 2.0 - 1
    w = box[2] - box[0]
    h = box[3] - box[1]
    x = x * dw
    w = w * dw
    y = y * dh
    h = h * dh

    return (x, y, w, h)


'''
Move Images and Annotation Files to Specified Training, Validation, and Test Sets
'''
def push_into_file(file, images, labels, ROOT_DIR, suffix='.jpg'):
    """
    Finally, all files in the current folder are stored in the folders of the training/validation/test set paths according to images and labels respectively
    :param file: List of file names
    :param images: Path to store images
    :param labels: Path to store labels
    :param label_path: Current file path
    :param suffix: Suffix of the image file
    :return:
    """
    # Traverse all files
    for filename in tqdm(file):
        # Image file
        image_file = os.path.join(ROOT_DIR, filename + suffix)
        # Annotation file
        label_file = os.path.join(ROOT_DIR, filename + '.txt')
        # Folder for YOLOv8 to store images
        if not os.path.exists(os.path.join(images, filename + suffix)):
            try:
                shutil.copy(image_file, images)
            except OSError:
                pass
        # Folder for YOLOv8 to store annotations
        if not os.path.exists(os.path.join(labels, filename + suffix)):
            try:
                shutil.move(label_file, labels)
            except OSError:
                pass


def json2txt(classes, ROOT_DIR=""):
    """
    Convert JSON files to TXT files
    :param classes: Class names
    :param label_path: Current file path
    :return:
    """

    # 'files' contains all JSON file names
    _, _, _, files = split_dataset(ROOT_DIR)

    for json_file_ in tqdm(files):
        # Path to JSON file
        json_filename = os.path.join(ROOT_DIR, json_file_ + ".json")
        # Path to the converted TXT label file
        out_file = open('%s/%s.txt' % (ROOT_DIR, json_file_), 'w')
        # Load the label JSON file
        json_file = json.load(open(json_filename, "r", encoding="utf-8"))

        img_w = json_file['imageWidth']
        img_h = json_file['imageHeight']

        '''
        Core: Label Conversion (JSON to TXT)
        '''
        for multi in json_file["shapes"]:

            if (multi['shape_type'] == 'rectangle'):
                x1 = int(multi['points'][0][0])
                y1 = int(multi['points'][0][1])
                x2 = int(multi['points'][1][0])
                y2 = int(multi['points'][1][1])

                label = multi["label"]

                cls_id = classes.index(label)
                bb = (x1, y1, x2, y2)

                bb = convert((img_w, img_h), bb)
                out_file.write(str(cls_id) + " " + " ".join([str(a) for a in bb]) + '\n')


'''
Create YAML File
'''
def create_yaml(classes, ROOT_DIR, isUseTest=False,dataYamlName=""):
    print('step5:Create the YAML file required for YOLOv8 training')

    classes_dict = {}

    for index, item in enumerate(classes):
        classes_dict[index] = item

    ROOT_DIR = os.path.abspath(ROOT_DIR)


    if not isUseTest:
        desired_caps = {
            'path': ROOT_DIR,
            'train': 'images/train',
            'val': 'images/val',
            'names': classes_dict
        }
    else:
        desired_caps = {
            'path': ROOT_DIR,
            'train': 'images/train',
            'val': 'images/val',
            'test': 'images/test',
            'names': classes_dict
        }
    yamlpath = os.path.join(ROOT_DIR, dataYamlName + ".yaml")

    # Write to the YAML file
    with open(yamlpath, "w+", encoding="utf-8") as f:
        for key, val in desired_caps.items():
            yaml.dump({key: val}, f, default_flow_style=False)


# First, ensure that all images in the current folder have a unified suffix, such as .jpg. If it's another suffix, change 'suffix' to the corresponding one, such as .png
def ChangeToYoloDet(ROOT_DIR="", suffix='.bmp',classes="", test_size=0.1, isUseTest=False,useNumpyShuffle=False,auto_genClasses = False,dataYamlName=""):
    """
    Generate files in the final standard format
    :param test_size: Proportion of the test set or validation set
    :param label_path: Current file path
    :param suffix: File suffix name
    :param isUseTest: Whether to use a test set
    :return:
    """
    # step1: Unify image formats
    change_image_format(ROOT_DIR,suffix)
    # step2: Split into training, validation, and test sets based on JSON files
    train_files, val_files, test_file, files = split_dataset(ROOT_DIR, test_size=test_size, isUseTest=isUseTest)
    # step3: Get all classes based on JSON files
    classes = classes
    # Whether to automatically get the number of classes from the dataset
    if auto_genClasses:
        classes = get_all_class(files, ROOT_DIR)
    '''
    step4:(***Core***)Convert JSON files to TXT files and store JSON files in the specified folder
    '''
    json2txt(classes, ROOT_DIR=ROOT_DIR)
    # step5: Create the YAML file required for YOLOv8 training
    create_yaml(classes, ROOT_DIR, isUseTest=isUseTest,dataYamlName=dataYamlName)
    # step6: Generate folders for YOLOv8 training, validation, and test sets
    train_image_dir, train_label_dir, val_image_dir, val_label_dir, test_image_dir, test_label_dir = create_save_file(ROOT_DIR,isUseTest)
    # step7: Move all images and annotation files to the corresponding training, validation, and test sets
    # Move files to the training set folder
    push_into_file(train_files, train_image_dir, train_label_dir,ROOT_DIR=ROOT_DIR, suffix=suffix)
    # Move files to the validation set folder
    push_into_file(val_files, val_image_dir, val_label_dir,ROOT_DIR=ROOT_DIR,  suffix=suffix)
    # If the test set exists, move files to the test set folder
    if test_file is not None:
        push_into_file(test_file, test_image_dir, test_label_dir, ROOT_DIR=ROOT_DIR, suffix=suffix)

    print('create dataset done')


if __name__ == "__main__":
    '''
    1.ROOT_DIR: Path to images and JSON labels
    2.suffix:Unified image suffix
    3.classes=['dog', 'cat'],  # Enter the names in your annotation list (note case sensitivity), used to customize the correspondence between class names and IDs
    4.test_size:Proportion of the test set or validation set
    5.isUseTest:Whether to enable the test set
    6.useNumpyShuffle:Whether to shuffle randomly
    7.auto_genClasses:Whether to automatically generate a class list based on JSON labels
    8.dataYamlName:Name of the dataset YAML file
    '''

    ChangeToYoloDet(
        ROOT_DIR = r'D:\HuaweiMoveData\Users\z9574\Desktop\yolo_detect_train\images2', # Try to avoid Chinese characters in the dataset path as much as possible.
        suffix='.png',  # Determine the image suffix for unifying image suffixes
        classes=[],  # Enter the names in your annotation list (note case sensitivity)
        test_size=0.3,  # If the test set is set, this is the proportion of the test set to the total dataset; otherwise, it's the proportion of the validation set to the total dataset
        isUseTest=False,  # Whether to enable the test set
        useNumpyShuffle=False,   # Whether to shuffle
        auto_genClasses = True,  # Whether to automatically generate class IDs based on the dataset
        dataYamlName= "bottle_data" # Name of the dataset YAML file
    )
The main function of the above program is ChangeToYoloDet, and only the following parameters need to be set:
| Parameters | Parameter meaning |
|---|---|
| ROOT_DIR | The path where the image and Labelme generated annotation file (json file) are located, absolute path (the current path cannot have a Chinese name, otherwise sometimes errors will occur when generating yaml file content) |
| test_size | If a test set is set, this is the proportion of the test set to the total data set; otherwise, this is the proportion of the validation set to the total data set. |
| isUseTest | Whether to test the set (if False, only the training set and validation set will be divided) |
| dataYamlName | Yolo training yaml file name, used in later training |
Executing the above script can generate the following file directories under the ROOT_DIR path. 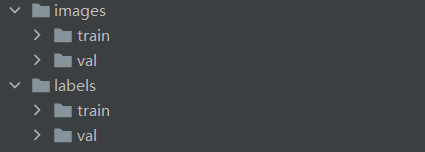
Among them, the images and annotation files have been divided into training sets and verification sets according to the proportion set by the script.
At the same time, a yaml file is also generated under the ROOT_DIR path. The name of the yaml file is specified by the dataYamlName parameter in the script file. This file is required for subsequent model detection and training.
Model Training to Obtain a Preliminary Detection Model
- Execute the following command to activate the virtual environment detect.
conda activate detect- Execute the yolov8 training command.
yolo detect train data=images2/bottle_data.yaml model=yolov8n.pt epochs=300 batch=16The parameters are described as follows:
| Parameters | Value to enter | Definition |
|---|---|---|
| data | images2/bottle_data.yaml | The path to the data set configuration file (for example, coco8.yaml). The file contains parameters specific to the dataset, including paths to training and validation data, class names, and number of classes. This is generated by the script above |
| model | yolov8n.pt | Specify the model file for training (it will be downloaded automatically, and a network is required) |
| epochs | 300 | Total number of training epochs. Each epoch represents one complete pass through the entire dataset. Adjusting this value will affect training time and model performance. |
| batch | 16 | Batch size |
| patience | 100 (default value) | Training will stop early if the validation metrics show no improvement after epochs reach patience rounds. |
When the training is completed, a runs folder will be generated, and the trained model will be stored in the detect\train\weights folder of the runs file.
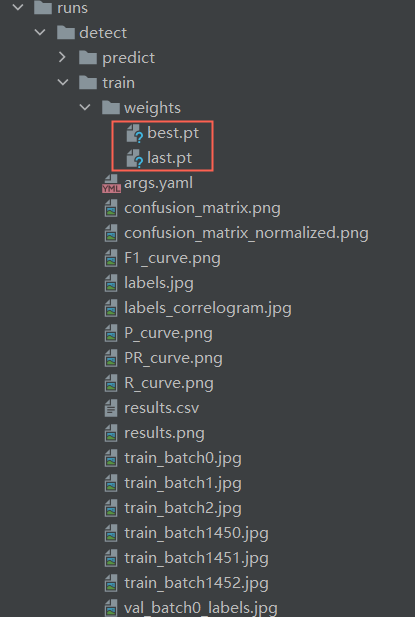
In the figure, best.pt and last.pt are both training weight files for the YOLO model. The difference is:
best.pt: What is saved is the weight of the model that performs best on the validation set during training. During training, the validation set is evaluated after each epoch and the weights of the best performing models are recorded. This file is typically used in the inference and deployment phases, as it contains the weights of the model that performed best on the validation set, enabling optimal performance.last.pt: What is saved is the model weight after the last training iteration. This file is often used to continue training a model because it contains the model weights at the end of the last training iteration, and you can continue training the model from where the previous training ended. The difference in use is that when you need to continue training on the basis of previous training, you should use last.pt as the starting point for training; when you need to use the trained model for interference and deployment, you should usebest.pt.
VIII. Automatic Annotation
Generate Labels Using Preliminary Detection Models
Execute the following command to detect the data set to be automatically annotated:
yolo predict model=runs\detect\train\weights\best.pt source=images\images save_txt=TrueThe parameters are described as follows:
| Parameters | Value to enter | Meaning |
|---|---|---|
| model | runs\detect\train\weights\best.pt | Weights used for detection (weights obtained from preliminary training, models obtained from the previous step) |
| source | images\images | Specify the data source used for inference. It can be an image path, video file, directory, URL or device ID of a real-time feed. Support multiple formats and sources. |
| save_txt | True | Save the detection results in a text file |
The results of the command outputting the detection image and detection file are shown in the figure below:


- Output image:
- YOLO will detect objects in the original input image with bounding boxes and save new images with annotations. Each image of a detected object will have one or more bounding boxes, each box surrounds an instance of the detected object.
- The image is saved in the runs\detect\predict directory under the current path.
- Output text file:
- For each processed image, YOLO also generates a
.txtfile with the same name as the image. This text file contains detailed information for each detected object instance, with a typical format of: Class ID, Confidence Score, Bounding Box Coordinates (top-left x-coordinate, top-left y-coordinate, width (w), height (h)). For example:0 0.8765 0.4567 0.3210 0.2345detects that this is an object with a category ID of 0 (assuming it is the 'bottle' category) with a confidence score of 87.65%, and the bounding box is located in the center of the image and occupies a certain proportion of the area. - Save it in the runs\detect\predict\labels directory under the current path.
At this time, you need to check the images of runs\detect\predict detection. If there are inaccurate or biased detections, you need to modify the generated label files.
Convert txt File Under Label to json File Used by Labelme
This step requires converting the file (txt format) generated in the previous step into the annotation file (json file) required by Labelme annotation software, so that Labelme can be used to fine-tune the annotation file later.
Txt2json.py is the script file downloaded in the Related Downloads.
The script file code example is as follows:
import os
import cv2
import json
import glob
import numpy as np


def convert_txt_to_labelme_json(txt_path, image_path, output_dir, image_fmt='.png'):
    # Convert txt to Labelme JSON
    # Convert YOLO txt to Labelme JSON
    txts = glob.glob(os.path.join(txt_path, "*.txt"))
    for txt in txts:
        labelme_json = {
            'version': '5.5.0',
            'flags': {},
            'shapes': [],
            'imagePath': None,
            'imageData': None,
            'imageHeight': None,
            'imageWidth': None,
        }
        txt_name = os.path.basename(txt)
        image_name = txt_name.split(".")[0] + image_fmt
        labelme_json['imagePath'] = image_name
        image_name = os.path.join(image_path, image_name)
        if not os.path.exists(image_name):
            raise Exception('txt file={},Image not found={}'.format(txt, image_name))
        image = cv2.imdecode(np.fromfile(image_name, dtype=np.uint8), cv2.IMREAD_COLOR)
        h, w = image.shape[:2]
        labelme_json['imageHeight'] = h
        labelme_json['imageWidth'] = w
        with open(txt, 'r') as t:
            lines = t.readlines()
            for line in lines:
                content = line.split(' ')
                label = content[0]
                object_width = float(content[3])
                object_height = float(content[4])
                top_left_x = (float(content[1]) - object_width / 2) * w
                top_left_y = (float(content[2]) - object_height / 2) * h
                bottom_right_x = (float(content[1]) + object_width / 2) * w
                bottom_right_y = (float(content[2]) + object_height / 2) * h
                try:
                    shape = {
                        'label': dict_.get(int(label)),
                        'score': float(content[5]),
                        'group_id': None,
                        'shape_type': 'rectangle',
                        'flags': {},
                        'points': [
                            [float(top_left_x), float(top_left_y)],
                            [float(bottom_right_x), float(bottom_right_y)]
                        ]
                    }
                except Exception as e:
                    # print(e)
                    shape = {
                        'label': dict_.get(int(label)),
                        'score': float(0.99),
                        'group_id': None,
                        'shape_type': 'rectangle',
                        'flags': {},
                        'points': [
                            [float(top_left_x), float(top_left_y)],
                            [float(bottom_right_x), float(bottom_right_y)]
                        ]
                    }
                labelme_json['shapes'].append(shape)
            json_name = txt_name.split('.')[0] + '.json'
            json_name_path = os.path.join(output_dir, json_name)
            fd = open(json_name_path, 'w')
            json.dump(labelme_json, fd, indent=4)
            fd.close()
            print("save json={}".format(json_name_path))


if __name__ == "__main__":

    dict_ = {0: "bottle"}
    in_imgs_dir = r'images\images'
    in_label_txt_dir = r'runs\detect\predict\labels'
    out_labelme_json_dir = in_imgs_dir

    if not os.path.exists(out_labelme_json_dir):
        os.mkdir(out_labelme_json_dir)
    convert_txt_to_labelme_json(in_label_txt_dir, in_imgs_dir, out_labelme_json_dir, image_fmt='.png')
Please modify the following parameters in the above script according to the following description.
| Parameters | Value to enter | Meaning |
|---|---|---|
| dict_ | Category name and id when annotating | Category name and id when annotating (to be changed to the tag name and id you customized when annotating images) |
| in_imgs_dir | images\images | Path of images to be fine-tuned |
| in_label_txt_dir | runs\detect\predict\labels | Previous step Model detection labels file save path |
| out_labelme_json_dir | in_imgs_dir | The save path for the JSON files generated by converting TXT files (set to the image path, so the JSON files are saved together with the images). |
TIP
Among them,in_imgs_dir is the storage path of the json file (required by Labelme) corresponding to the generated image.
Fine-tuning Labels
Use the Labelme annotation tool to load the generated annotation files and corresponding images, and fine-tune the labels detected by the model.
The purpose of fine-tuning with Labelme is:
- Correction of incorrect annotations: The labels generated by the preliminary detection model may contain errors or inaccurate annotations, which can be corrected through fine-tuning.
- Improve the quality of labeling: The quality of automatically generated labels may not be as high as that of manual ones, and fine-tuning can improve the accuracy of labeling.

IX. Retraining
Move all files (images and JSON files) from "images2" and all files (images and JSON files) from "images/images" into a new folder named "images3". Then execute Conversion FormatandModel Training to Obtain a Preliminary Detection Model, and start the model training process following the steps.
After the model training is completed, the final generated model file is stored in the weights folder.

X. Using Model
Connect the camera and computer with a docking station, put best.pt and the detection script yolov8.py in the same path, aim the D435 camera lens at the object to be detected, and use the best.pt model for detection.
Yolov8.py is the script file downloaded in theRelated Downloads.
The script file code example is as follows:
import cv2
import pyrealsense2 as rs
import time
import numpy as np
import math
from ultralytics import YOLO
# Load YOLOv8 model
model = YOLO("best.pt")
# # Get camera content, parameter 0 means using the default camera
# cap = cv2.VideoCapture(1)
# Configure RealSense
pipeline = rs.pipeline()
config = rs.config()
config.enable_stream(rs.stream.depth, 848, 480, rs.format.z16, 30)
config.enable_stream(rs.stream.color, 848, 480, rs.format.bgr8, 30)
# Start camera stream
pipeline.start(config)
align_to = rs.stream.color # Align with color stream
align = rs.align(align_to)
def get_aligned_images():
frames = pipeline.wait_for_frames() # Wait to get image frames
aligned_frames = align.process(frames) # Get aligned frames
aligned_depth_frame = aligned_frames.get_depth_frame() # Get depth frame from aligned frames
color_frame = aligned_frames.get_color_frame() # Get color frame from aligned frames
# Get camera parameters
intr = color_frame.profile.as_video_stream_profile().intrinsics # Get camera intrinsics
depth_intrin = aligned_depth_frame.profile.as_video_stream_profile(
).intrinsics # Get depth parameters (used for converting pixel coordinates to camera coordinates)
'''camera_parameters = {'fx': intr.fx, 'fy': intr.fy,
'ppx': intr.ppx, 'ppy': intr.ppy,
'height': intr.height, 'width': intr.width,
'depth_scale': profile.get_device().first_depth_sensor().get_depth_scale()
}'''
# Save intrinsics locally
# with open('./intrinsics.json', 'w') as fp:
# json.dump(camera_parameters, fp)
#######################################################
depth_image = np.asanyarray(aligned_depth_frame.get_data()) # Depth map (16-bit by default)
depth_image_8bit = cv2.convertScaleAbs(depth_image, alpha=0.03) # 8-bit depth map
depth_image_3d = np.dstack(
(depth_image_8bit, depth_image_8bit, depth_image_8bit)) # 3-channel depth map
color_image = np.asanyarray(color_frame.get_data()) # RGB image
# Return camera intrinsics, depth parameters, color image, depth image, depth frame from aligned frames
return intr, depth_intrin, color_image, depth_image, aligned_depth_frame
def get_3d_camera_coordinate(depth_pixel, aligned_depth_frame, depth_intrin):
x = depth_pixel[0]
y = depth_pixel[1]
dis = aligned_depth_frame.get_distance(x, y) # Get the depth corresponding to this pixel
# print ('depth: ',dis) # Depth unit is meters
camera_coordinate = rs.rs2_deproject_pixel_to_point(depth_intrin, depth_pixel, dis)
# print ('camera_coordinate: ',camera_coordinate)
return dis, camera_coordinate
# Initialize FPS calculation
fps = 0
frame_count = 0
start_time = time.time()
try:
while True:
# Wait to get a pair of consecutive frames: depth and color
intr, depth_intrin, color_image, depth_image, aligned_depth_frame = get_aligned_images()
if not depth_image.any() or not color_image.any():
continue
# Get current time
time1 = time.time()
# Convert image to numpy array
depth_colormap = cv2.applyColorMap(cv2.convertScaleAbs(
depth_image, alpha=0.03), cv2.COLORMAP_JET)
images = np.hstack((color_image, depth_colormap))
# Perform object detection with YOLOv8
results = model.predict(color_image, conf=0.5)
annotated_frame = results[0].plot()
detected_boxes = results[0].boxes.xyxy # Get bounding box coordinates
# print('Bounding box coordinates', detected_boxes)
for i, box in enumerate(detected_boxes):
x1, y1, x2, y2 = map(int, box) # Get bounding box coordinates
# Calculate step size
xrange = max(1, math.ceil(abs((x1 - x2) / 30)))
yrange = max(1, math.ceil(abs((y1 - y2) / 30)))
# xrange = 1
# yrange = 1
point_cloud_data = []
# Get 3D coordinates of points within the range
for x_position in range(x1, x2, xrange):
for y_position in range(y1, y2, yrange):
depth_pixel = [x_position, y_position]
dis, camera_coordinate = get_3d_camera_coordinate(depth_pixel, aligned_depth_frame,
depth_intrin) # Get 3D coordinates of the corresponding pixel
point_cloud_data.append(f"{camera_coordinate} ")
# Write all data at once
with open("point_cloud_data.txt", "a") as file:
file.write(f"\nTime: {time.time()}\n")
file.write(" ".join(point_cloud_data))
# Display center point coordinates
ux = int((x1 + x2) / 2)
uy = int((y1 + y2) / 2)
dis, camera_coordinate = get_3d_camera_coordinate([ux, uy], aligned_depth_frame,
depth_intrin) # Get 3D coordinates of the corresponding pixel
formatted_camera_coordinate = f"({camera_coordinate[0]:.2f}, {camera_coordinate[1]:.2f}, {camera_coordinate[2]:.2f})"
cv2.circle(annotated_frame, (ux, uy), 4, (255, 255, 255), 5) # Mark the center point
cv2.putText(annotated_frame, formatted_camera_coordinate, (ux + 20, uy + 10), 0, 1,
[225, 255, 255], thickness=1, lineType=cv2.LINE_AA) # Mark the coordinates
# Calculate FPS
frame_count += 1
time2 = time.time()
fps = int(1 / (time2 - time1))
# Display FPS
cv2.putText(annotated_frame, f'FPS: {fps:.2f}', (10, 30), cv2.FONT_HERSHEY_SIMPLEX, 1, (0, 255, 0), 2,
cv2.LINE_AA)
# Display results
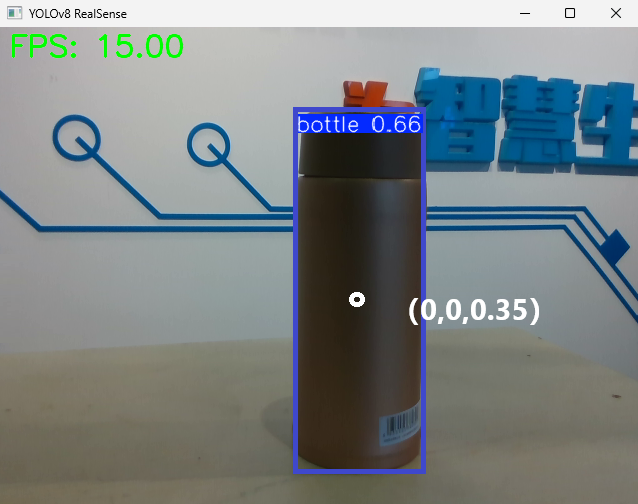
cv2.imshow('YOLOv8 RealSense', annotated_frame)
if cv2.waitKey(1) & 0xFF == ord('q'):
break
finally:
# Stop the stream
pipeline.stop()If the training model is normal, a box will appear as shown in the figure below to frame the target object. The center of the box shows the position of the object in the camera coordinate system (the unit of x, y, z is m), and the upper left corner shows the detection category and confidence rate of the object.