#
Blog:
Controlling the Dexterous Hand using the Teach Pendant and API##RM_ARM+ Protocol - Controlling the Dexterous Hand Using the Teach Pendant
###Hardware Connection
Connecting the Robot and the Teach Pendant
Refer to the robot wiring and power-on guide to complete the robot system power-up and establish a teach pendant connection.
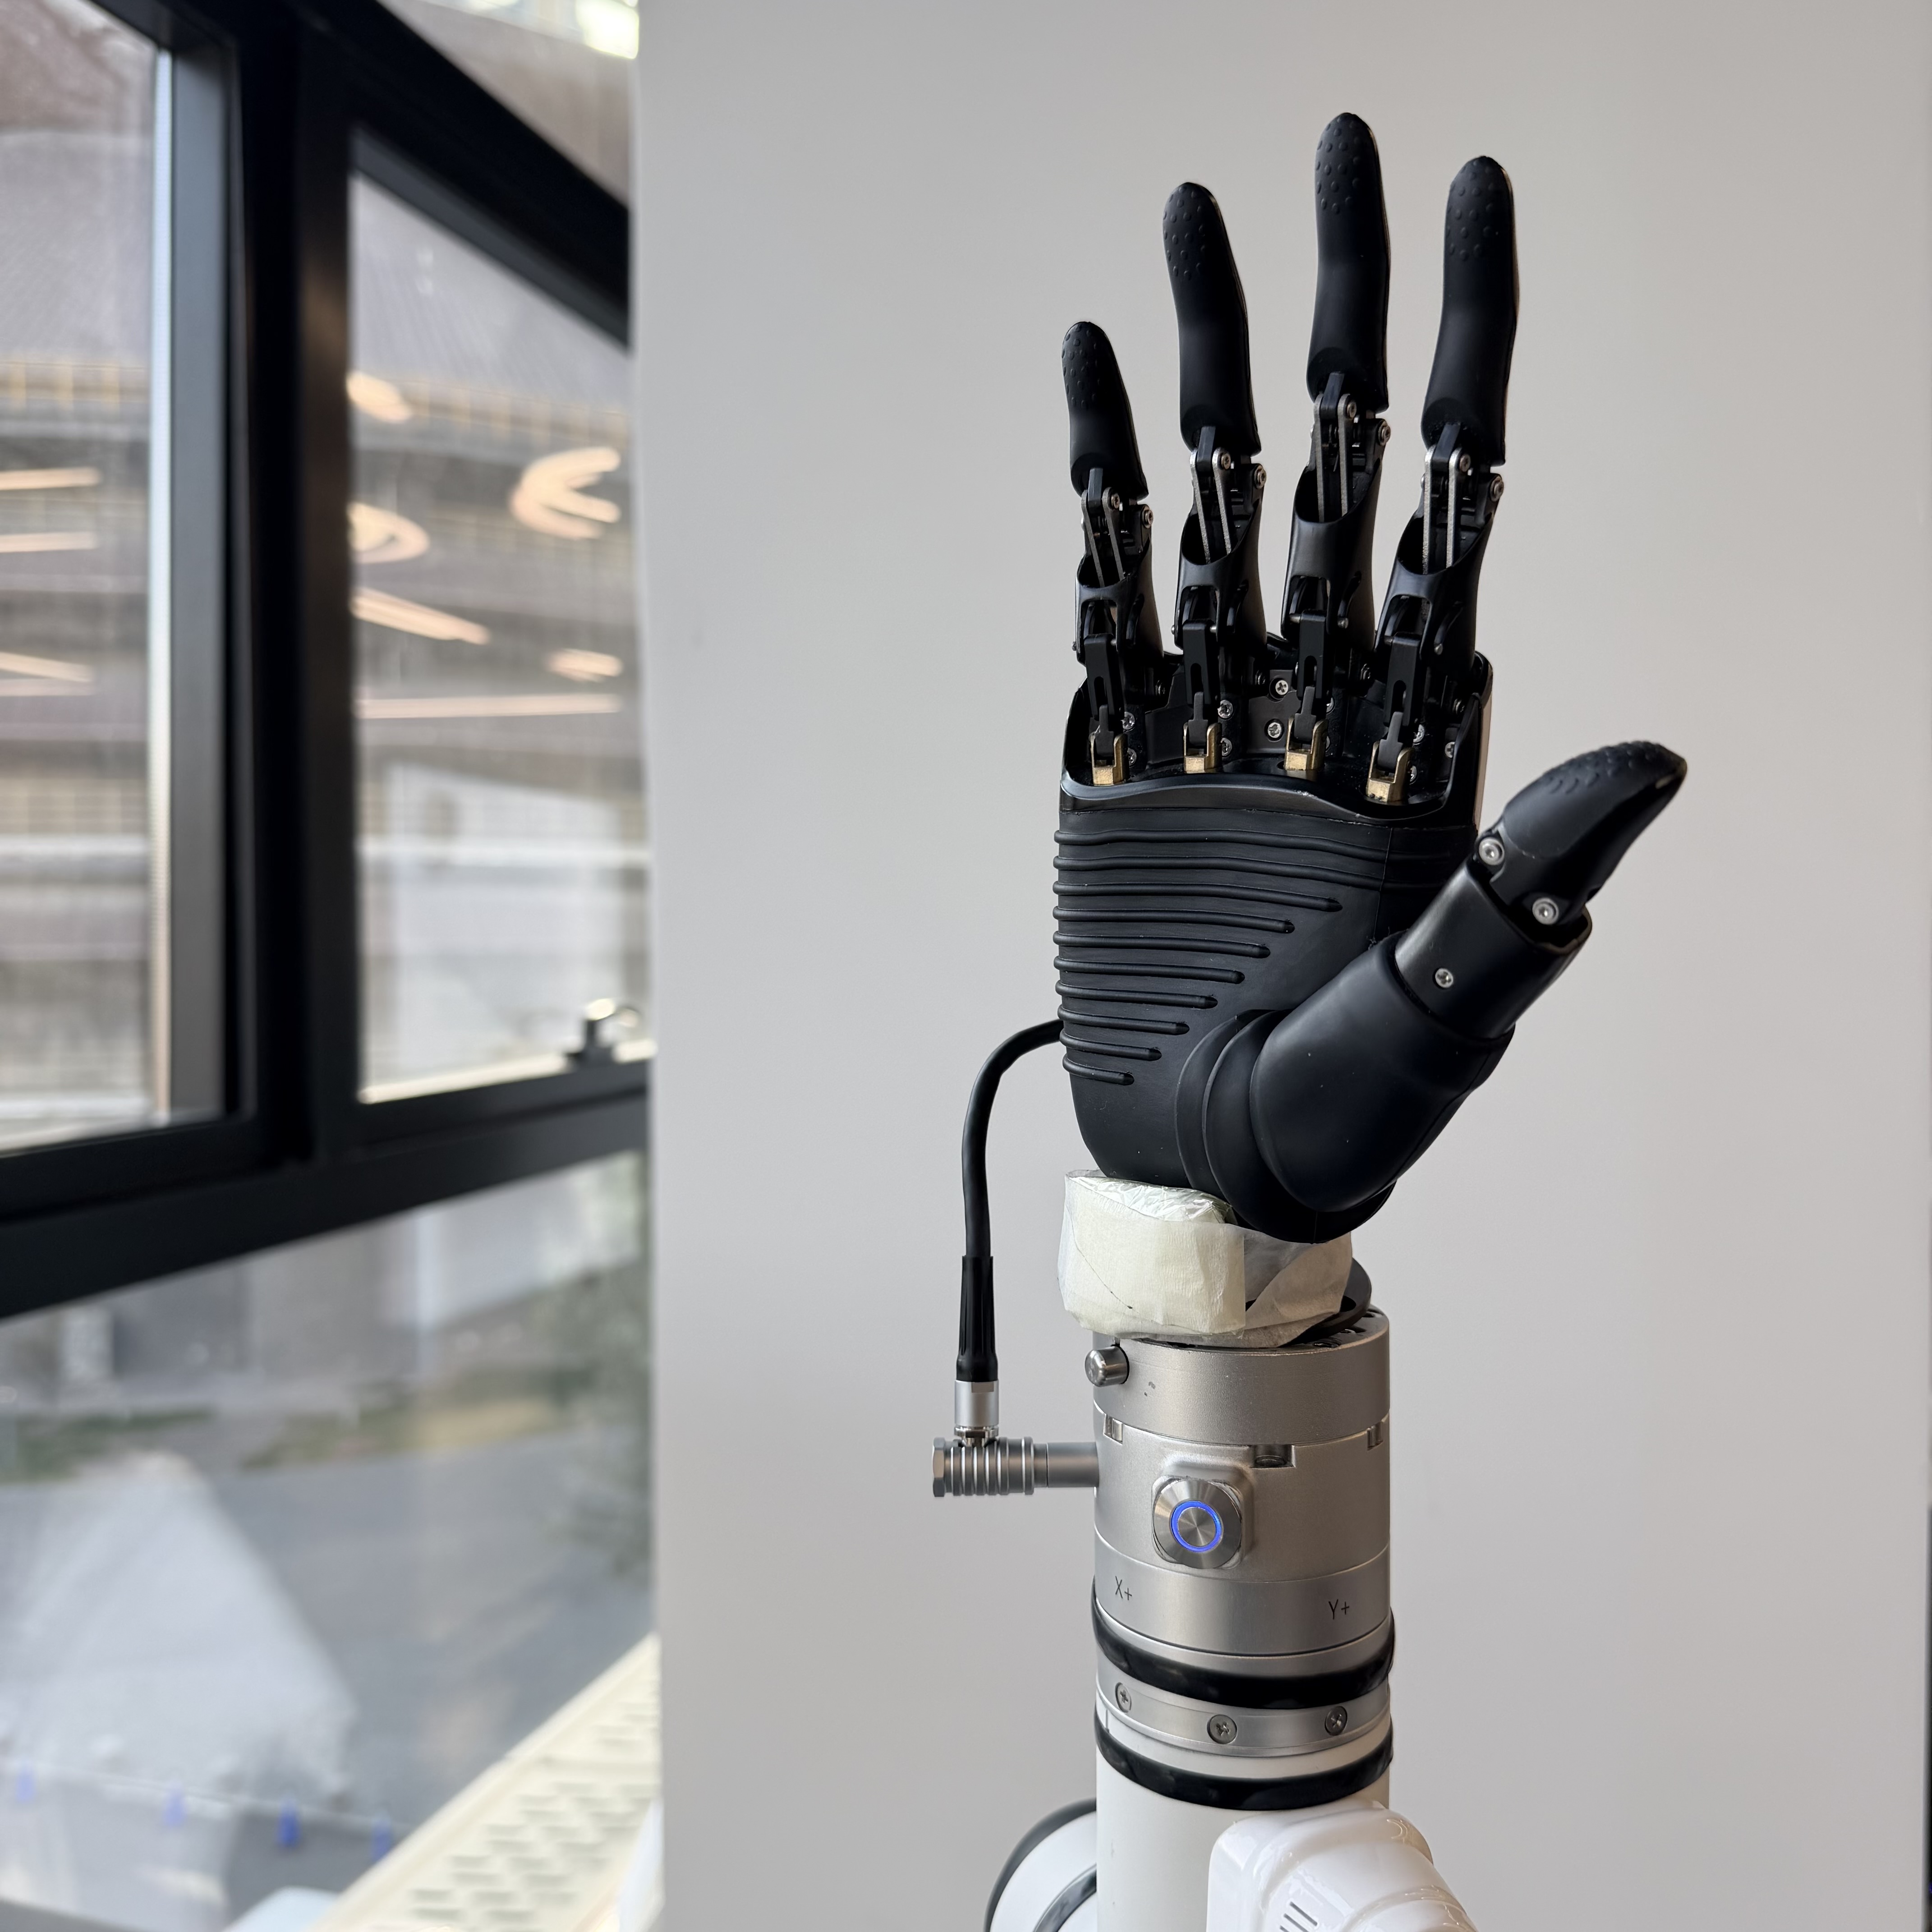
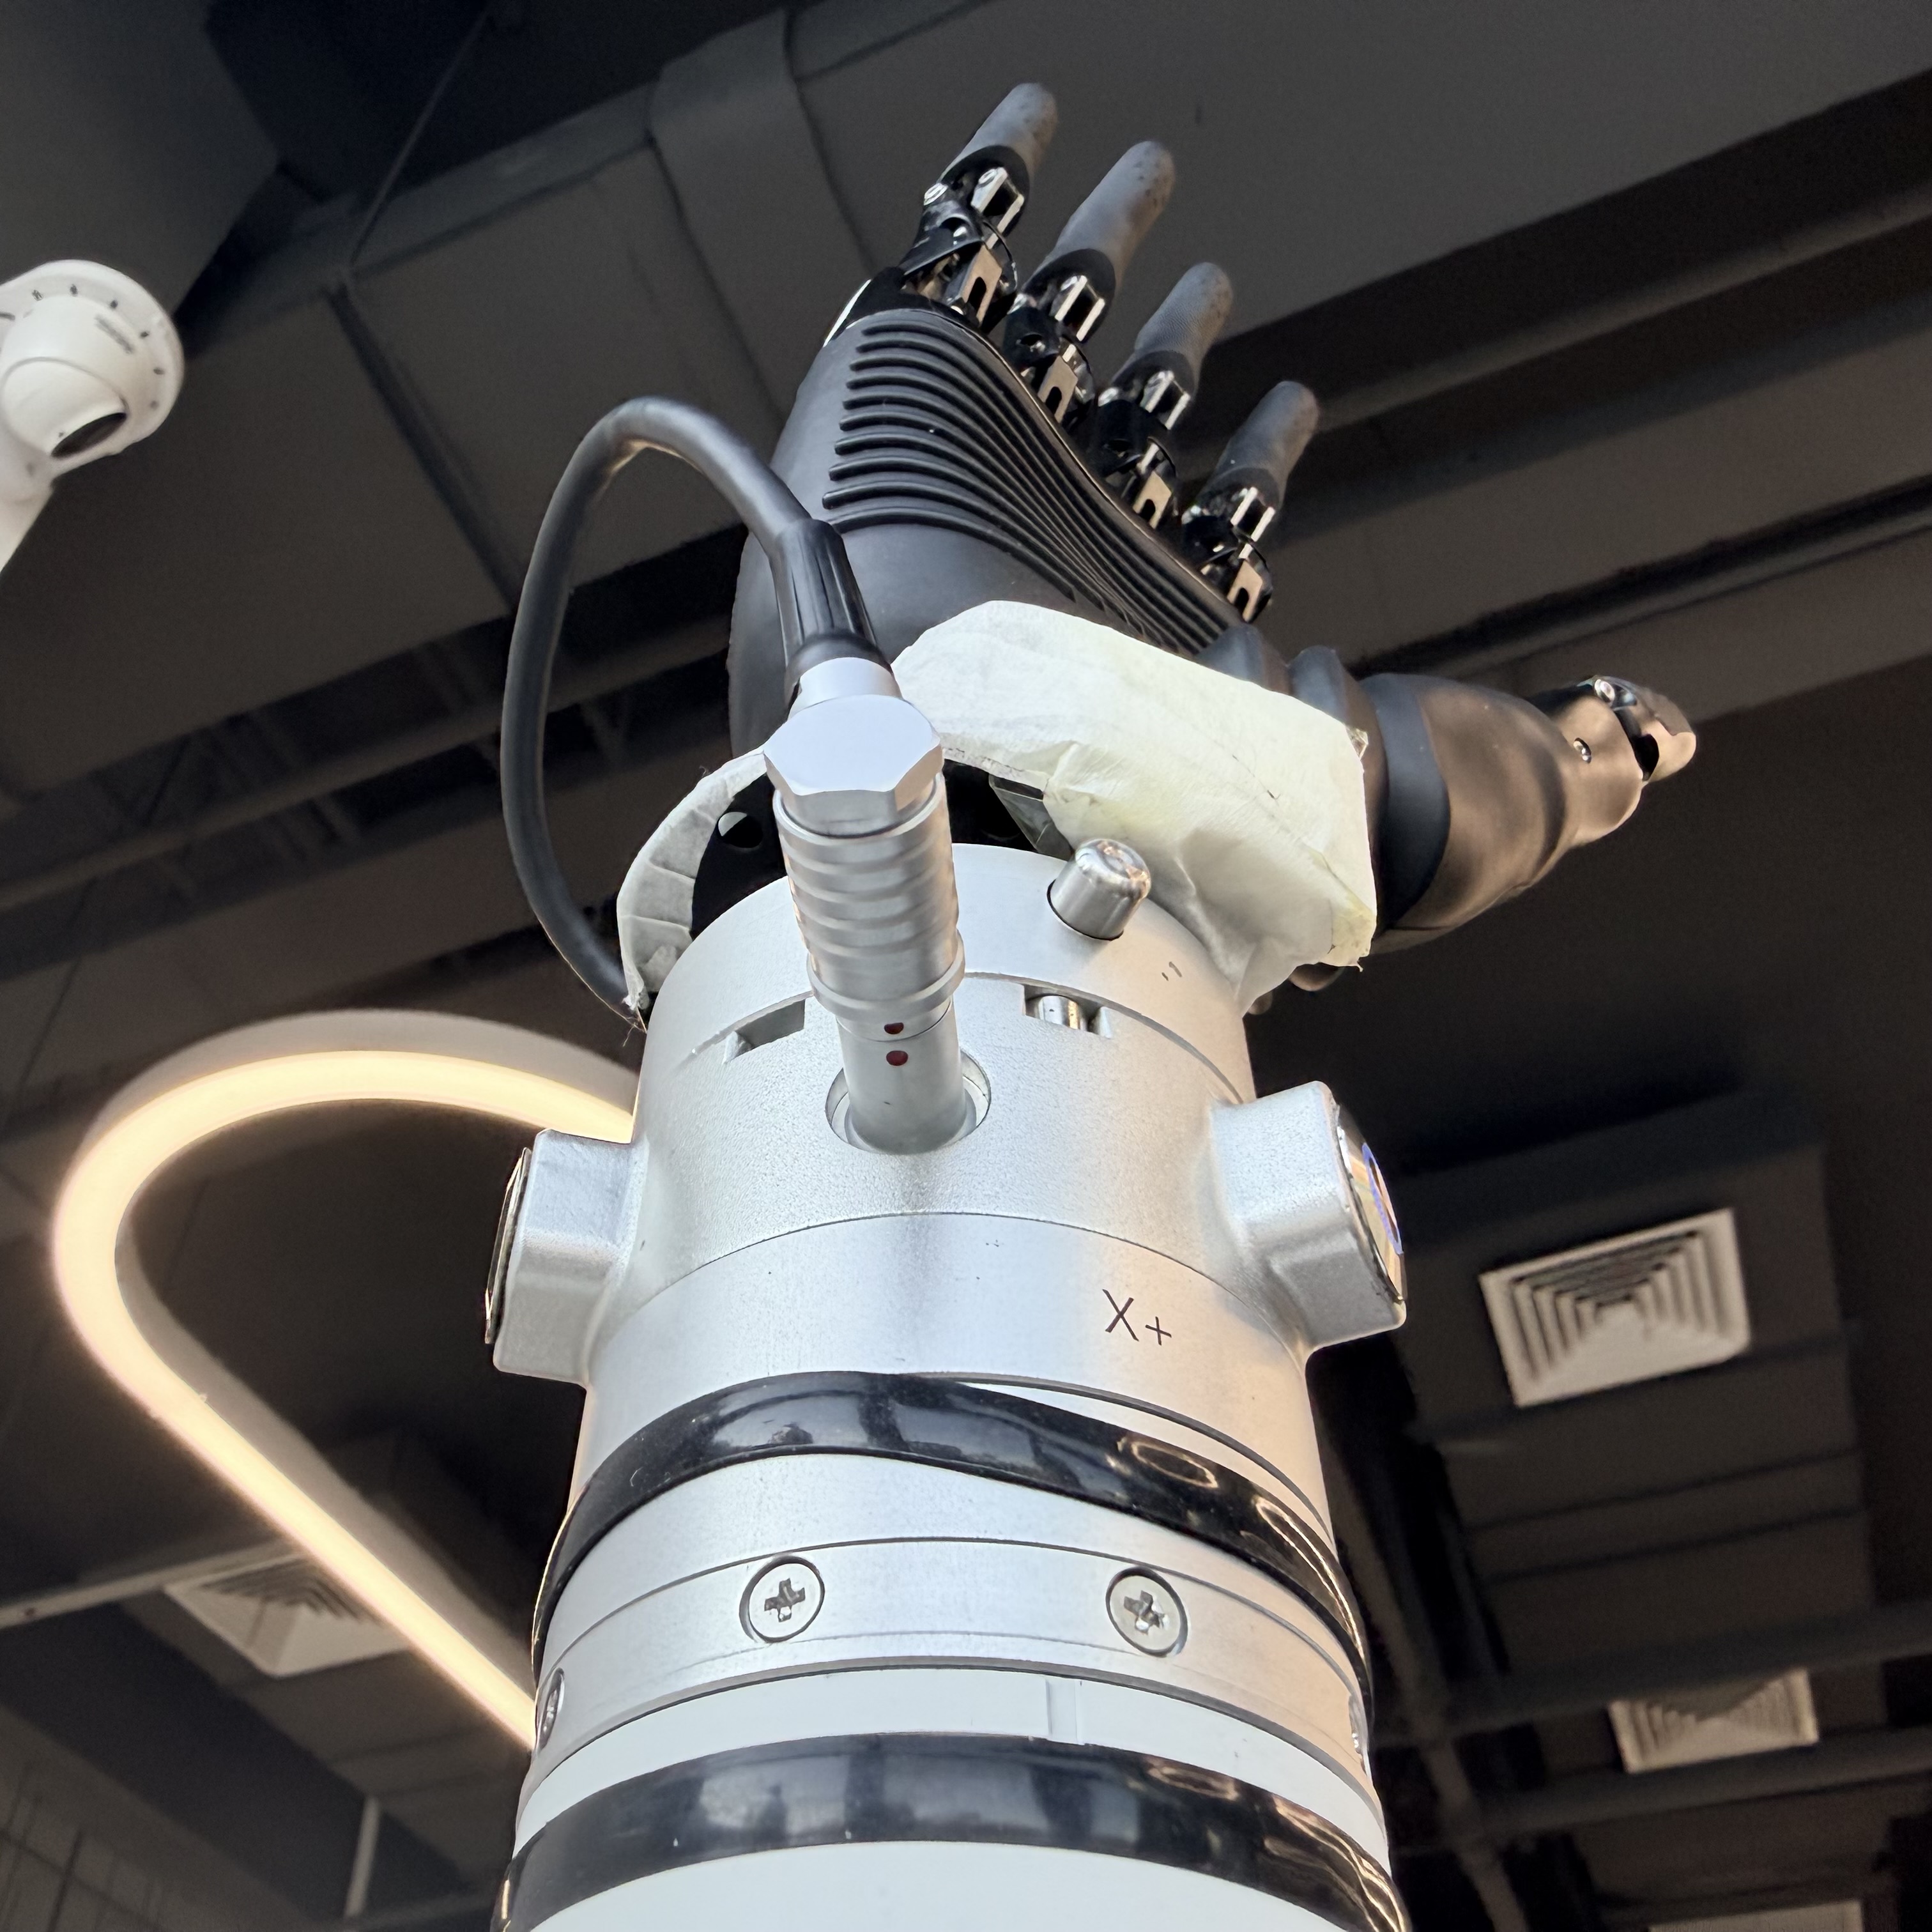
Connecting the Dexterous Hand and the Robotic Arm
Use a dedicated aviation connector cable to connect the dexterous hand to the robotic arm interface. Key Step: Ensure the red/blue indicator points on the connector are precisely aligned to achieve correct electrical and signal connection.
 |  |
|---|
###Parameter Configuration
Complete the communication and power supply configuration for the dexterous hand as an end tool through the teach pendant. Steps are as follows:
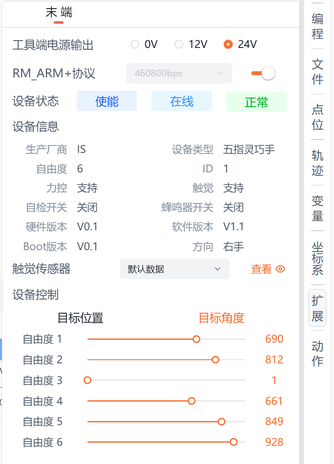
On the teach pendant main interface, navigate to Extensions > End-Effector Control.
In the end-effector control interface, configure the following core parameters:
Tool-Side Power Output: Select
24Vor12Vpower supply according to the dexterous hand specifications.Communication Baud Rate: It is recommended to set it to
115200 bpsfirst to ensure communication stability.Communication Protocol: Enable the
RM_ARM+protocol.
After configuration is complete, you can verify device connection status, view basic information, and perform preliminary control tests within the same interface.
###Device Control
The dexterous hand provides two intuitive motion control modes. Users can choose based on the application scenario:
Target Position Control
Target Angle Control
Operation Method: In the corresponding control mode interface, drag the slider for the specified degree of freedom in real-time. The dexterous hand will respond immediately and execute the corresponding action, achieving "what you see is what you get" real-time control.
###End-Effector Actions
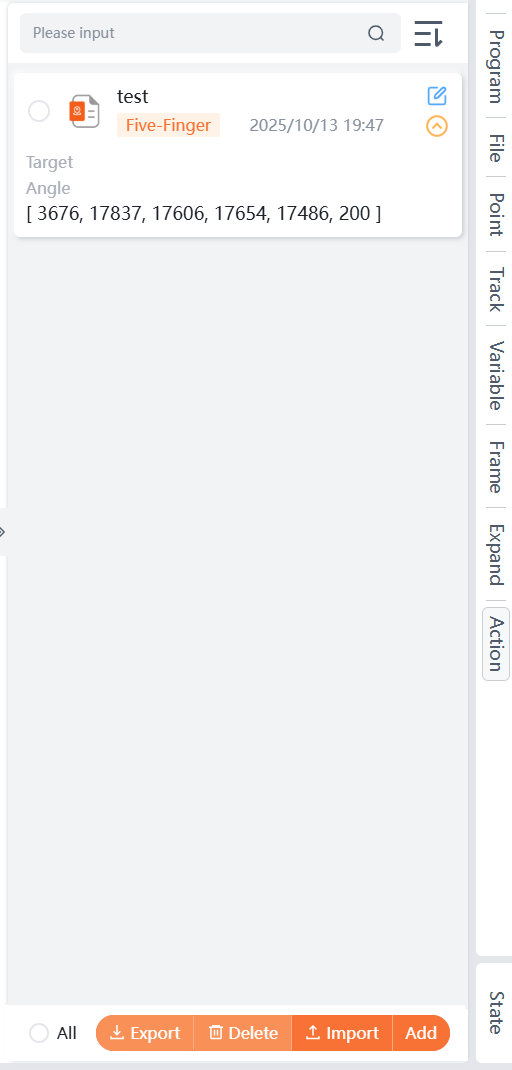
To simplify programming for complex grasping or operation sequences, the system supports saving a series of control commands as reusable "end-effector actions".
####Creating a New Action
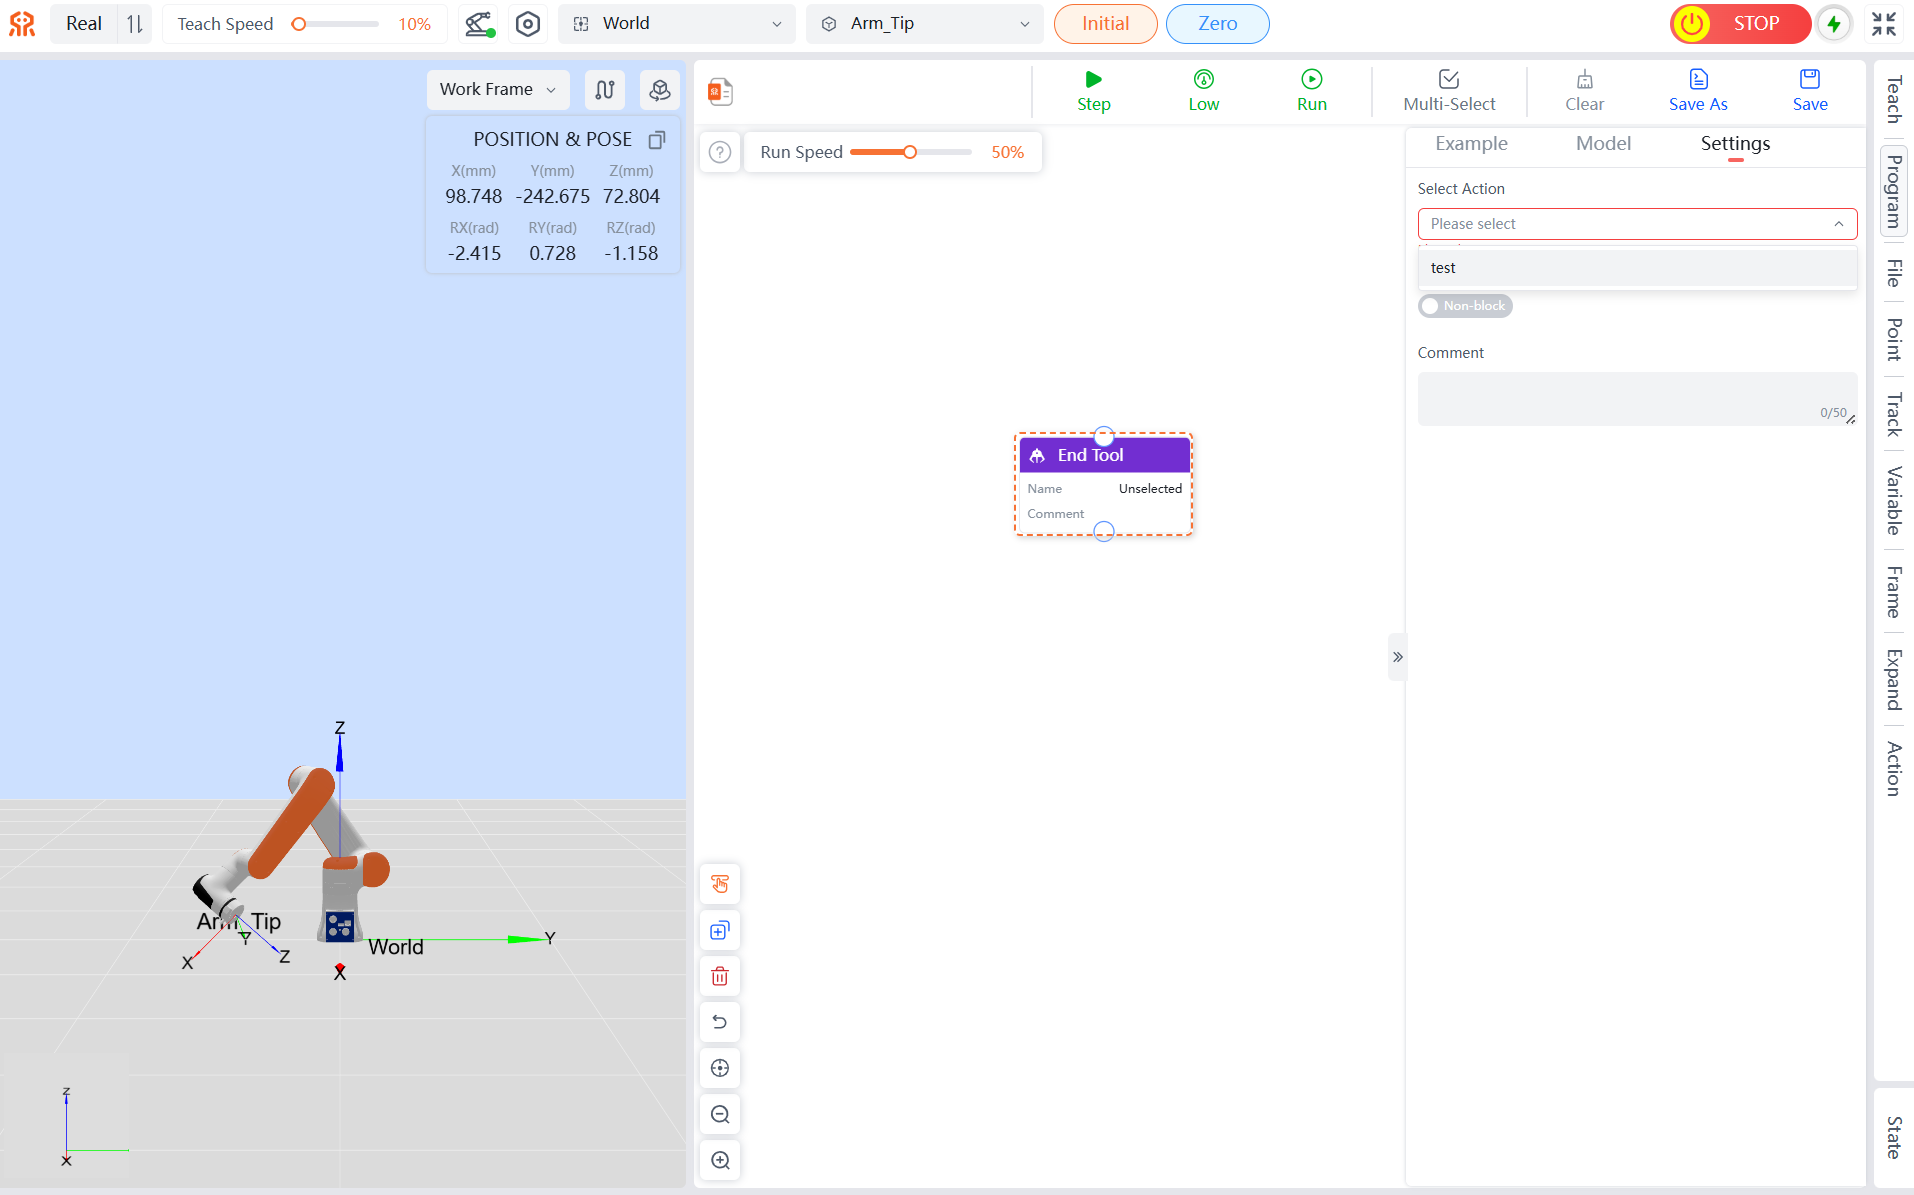
Click Add in the Action Management interface to enter the Extensions > End-Effector page. Users can customize the dexterous hand's Target Position, Target Angle, and other information, and finally save it as an independent action file.
####Managing the Action Library
The system provides complete action file management functions, supporting the following for saved actions:
Action Query
Action Modification
Action Export
Action Deletion
...
####Invoking Actions in Graphical Programming
This feature greatly enhances programming efficiency:
In the graphical programming interface, drag the End-Effector Tool node into the programming canvas.
Select this node, and in the right-side Settings panel, directly choose the pre-configured action file from the dropdown menu.
##RM_ARM+ Protocol - Controlling the Dexterous Hand Using API2
Reminder
- Third-generation controller version >= 1.7.0
- Fourth-generation controller version >= 1.0.4
- API2 version >= 1.0.7
###Environment Configuration
Setting Up the Environment: Install Visual Studio and Ubuntu to establish the runtime environment.
Obtaining Development Resources: Visit the Realman Official Website to download the Demo files.
Project Configuration: In Visual Studio, open the downloaded Demo folder as the project root directory.
###Core API Interface Details
####Setting Dexterous Hand Angle Follow Control rm_set_hand_follow_angle()
Control Dimensions:
The dexterous hand provides angle follow control for 6 active degrees of freedom with a maximum control frequency of 50Hz:
- DOF 1: Thumb flexion
- DOF 2: Index finger
- DOF 3: Middle finger
- DOF 4: Ring finger
- DOF 5: Little finger
- DOF 6: Thumb rotation
Angle Value Definition (int16):
| Supplier | Angle Value Calculation Method |
|---|---|
| Aoyi | First knuckle joint angle * 100. |
| InShen | 0-1000. Obtain the relationship table between driver stroke and angle by contacting technical support. |
Note
Before using this function, you must contact the ecosystem partner's technical support to obtain a customized dexterous hand firmware upgrade package.
####Setting Dexterous Hand Position Follow Control rm_set_hand_follow_pos()
Control Dimensions:
The dexterous hand provides position follow control for 6 active degrees of freedom with a maximum control frequency of 50Hz:
- DOF 1: Thumb flexion
- DOF 2: Index finger
- DOF 3: Middle finger
- DOF 4: Ring finger
- DOF 5: Little finger
- DOF 6: Thumb rotation
Note
Before using this function, you must contact the ecosystem partner's technical support to obtain a customized dexterous hand firmware upgrade package.
###Parameter Description
Setting Dexterous Hand Angle Follow Control
rm_set_hand_follow_angle()int rm_set_hand_follow_angle(rm_robot_handle *handle, const int *hand_angle, bool block);Parameter Type Description handle Input Robot arm handle. hand_angle Input Sets the action for each finger of the dexterous hand. hand_anglerepresents the finger angle array, controlled according to the angle definition by the dexterous hand manufacturer.
For example: InShen's angle range is 0 to +1000; Aoyi's angle range is -32768 to +32767.block Input true: Non-blocking mode, returns after successful sending.
false: Blocking mode, returns after receiving a successful setting confirmation.Setting Dexterous Hand Position Follow Control
rm_set_hand_follow_pos()int rm_set_hand_follow_pos(rm_robot_handle *handle, const int *hand_pos, bool block);Parameter Type Description handle Input Robot arm handle. hand_pos Input Sets the action for each finger of the dexterous hand. hand_posrepresents the finger position array, controlled according to the definition by the dexterous hand manufacturer.
For example: InShen's position range is 0-2000; Aoyi's position range is 0-65535.block Input true: Non-blocking mode, returns after successful sending.
false: Blocking mode, returns after receiving a successful setting confirmation.Return Value
API2 error codes for
rm_set_hand_follow_angleandrm_set_hand_follow_pos.Code Type Description Handling Suggestion 0 int Success. - 1 int Controller returned false, indicating parameter passing error or robot arm state error. Check robot arm status: View real-time error messages in the robot controller or logs (e.g., hardware failure, limit exceeded), and reset, calibrate, or troubleshoot hardware issues as prompted.
After fixing the issue, resend the command and check the controller's returned status code and business data.-1 int Data sending failed, communication issue occurred. Check network connectivity: Use tools like ping/telnet to verify the communication link to the controller. -2 int Data reception failed, communication issue occurred or controller timed out. - Check network connectivity: Use tools like ping/telnet to verify the communication link to the controller.
- Verify version compatibility: ① Confirm if the controller firmware version supports the current API function. Refer to version change notes for specific version relationships. ② Upgrade the controller or use a compatible API version if the version is too low.
- Call the ModbusTCP interface: Applicable only when reading/writing the controller's ModbusTCP device. After creating the robot arm control handle, you must call therm_set_modbustcp_mode()interface, otherwise no return value can be received.-3 int Return value parsing failed, received data format is incorrect or incomplete. Verify version compatibility:
① Confirm if the controller firmware version supports the current API function. Refer to version change notes for specific version relationships. ② Upgrade the controller or use a compatible API version if the version is too low.-4 int Current ready device verification failed, meaning the current ready device is not a joint/lift/gripper/dexterous hand. - Detect concurrent control by multiple devices: Check if other devices are sending motion commands to the robot arm, including robot arm, gripper, dexterous hand, and lift motions.
- Monitor instruction events in real-time: Register callback functionrm_get_arm_event_call_back: ① Capture device ready events (e.g., motion completion, timeout); ② Determine the specific device type that triggered the event via the callback parameterdevice.-5 int Single-thread blocking mode timed out without receiving a return. Ensure the timeout setting is reasonable. - Check timeout duration setting: In single-thread blocking mode, you can configure the timeout for waiting for device motion completion. Ensure the timeout is greater than the device's motion time.
- Check network connectivity: Use tools like ping/telnet to verify the communication link to the controller.-6 int Robot arm stopped motion planning due to an external stop command. Investigate external emergency stop commands:
Check if an external emergency stop command was issued, e.g., sending an emergency stop JSON protocol, triggering an IO emergency stop, or triggering an emergency stop on the teach pendant.
###Specific Operations
####C Language Example
Dexterous Hand Angle Follow Control
Open the
RMDemo_RMArmPlusProtocolproject file in VS and edit themain.cfile as follows to control the dexterous hand.
#include <stdio.h>
#include "rm_interface.h"
// Windows-specific headers and definitions
#ifdef _WIN32
#define SLEEP_MS(ms) Sleep(ms)
#define SLEEP_S(s) Sleep((s) * 1000)
#define usleep(us) Sleep((us) / 1000)  // No usleep, use Sleep instead
// Linux-specific headers and definitions
#else
#include <unistd.h>
#include <sys/time.h>
#define SLEEP_MS(ms) usleep((ms) * 1000)
#define SLEEP_S(s) sleep(s)

#endif

void custom_api_log(const char* message, va_list args) {
    if (!message) {
        fprintf(stderr, "Error: message is a null pointer\n");
        return;
    }

    char buffer[1024];
    vsnprintf(buffer, sizeof(buffer), message, args);
    printf(" %s\n", buffer);
}


int main(int argc, char* argv[]) {
    int result = -1;

    rm_set_log_call_back(custom_api_log, 3);
    result = rm_init(RM_TRIPLE_MODE_E);
    if (result != 0) {
        printf("Initialization failed with error code: %d.\n", result);
        return -1;
    }

    char* api_version = rm_api_version();
    printf("API Version: %s.\n", api_version);

    const char* robot_ip_address = "192.168.1.18";
    int robot_port = 8080;
    rm_robot_handle* robot_handle = rm_create_robot_arm(robot_ip_address, robot_port);
    if (robot_handle == NULL) {
        printf("Failed to create robot handle.\n");
        return -1;
    }
    else {
        printf("Robot handle created successfully: %d\n", robot_handle->id);
    }
    rm_arm_software_version_t software_info;
    result = rm_get_arm_software_info(robot_handle, &software_info);
    if (result == 0) {
        printf("================== Arm Software Information ==================\n");
        printf("Arm Model:  %s\n", software_info.product_version);
        printf("Algorithm Library Version:  %s\n", software_info.algorithm_info.version);
        printf("Control Layer Software Version:  %s\n", software_info.ctrl_info.version);
        printf("Dynamics Version:  %s\n", software_info.dynamic_info.model_version);
        printf("Planning Layer Software Version:  %s\n", software_info.plan_info.version);
        printf("==============================================================\n");
    }

    rm_robot_info_t arm_info;
    result = rm_get_robot_info(robot_handle, &arm_info);
    if (result != 0)
    {
        return -1;
    }

    const int angle[6] = { 1200,1400,200,300,400,100 };
    bool block = true;
    rm_set_hand_follow_angle(robot_handle, angle, block);
    int ret = rm_set_hand_follow_angle(robot_handle, angle, block);
    if (ret == 0) {
        printf("Dexterous hand operation completed\n");
    }
    else {
        printf("Dexterous hand operation failed\n");
    }
}

- Dexterous Hand Position Follow Control

   Open the `RMDemo_RMArmPlusProtocol` project file in VS and edit the `main.c` file as follows to control the dexterous hand.

```C
#include <stdio.h>
#include "rm_interface.h"
// Windows-specific headers and definitions
#ifdef _WIN32
#define SLEEP_MS(ms) Sleep(ms)
#define SLEEP_S(s) Sleep((s) * 1000)
#define usleep(us) Sleep((us) / 1000)  // No usleep, use Sleep instead
// Linux-specific headers and definitions
#else
#include <unistd.h>
#include <sys/time.h>
#define SLEEP_MS(ms) usleep((ms) * 1000)
#define SLEEP_S(s) sleep(s)

#endif

void custom_api_log(const char* message, va_list args) {
    if (!message) {
        fprintf(stderr, "Error: message is a null pointer\n");
        return;
    }

    char buffer[1024];
    vsnprintf(buffer, sizeof(buffer), message, args);
    printf(" %s\n", buffer);
}


int main(int argc, char* argv[]) {
    int result = -1;

    rm_set_log_call_back(custom_api_log, 3);
    result = rm_init(RM_TRIPLE_MODE_E);
    if (result != 0) {
        printf("Initialization failed with error code: %d.\n", result);
        return -1;
    }

    char* api_version = rm_api_version();
    printf("API Version: %s.\n", api_version);

    const char* robot_ip_address = "192.168.1.18";
    int robot_port = 8080;
    rm_robot_handle* robot_handle = rm_create_robot_arm(robot_ip_address, robot_port);
    if (robot_handle == NULL) {
        printf("Failed to create robot handle.\n");
        return -1;
    }
    else {
        printf("Robot handle created successfully: %d\n", robot_handle->id);
    }
    rm_arm_software_version_t software_info;
    result = rm_get_arm_software_info(robot_handle, &software_info);
    if (result == 0) {
        printf("================== Arm Software Information ==================\n");
        printf("Arm Model:  %s\n", software_info.product_version);
        printf("Algorithm Library Version:  %s\n", software_info.algorithm_info.version);
        printf("Control Layer Software Version:  %s\n", software_info.ctrl_info.version);
        printf("Dynamics Version:  %s\n", software_info.dynamic_info.model_version);
        printf("Planning Layer Software Version:  %s\n", software_info.plan_info.version);
        printf("==============================================================\n");
    }

    rm_robot_info_t arm_info;
    result = rm_get_robot_info(robot_handle, &arm_info);
    if (result != 0)
    {
        return -1;
    }

    const int pos[6] = { 1000,100,200,300,400,1000 };
    bool block = true;
    rm_set_hand_follow_pos(robot_handle, pos, block);
    int ret = rm_set_hand_follow_pos(robot_handle, pos, block);
    if (ret == 0) {
        printf("Dexterous hand operation completed\n");
    }
    else {
        printf("Dexterous hand operation failed\n");
    }
}
####Python Example
Robotic_Arm
Obtain the second-generation Realman robot arm Python SDK for secondary development.
Installation
You can install this package via pip:
pip install Robotic_ArmDexterous Hand Angle Follow Control
from Robotic_Arm.rm_robot_interface import *
import time

# Instantiate the RoboticArm class
arm = RoboticArm(rm_thread_mode_e.RM_TRIPLE_MODE_E)
# Create a robot arm connection and print the connection ID
handle = arm.rm_create_robot_arm("192.168.1.18", 8080)
print("handle.id",handle.id)
# Dexterous hand angle follow control
hand_angle = [0,0,0,0,0,0]
print("rm_set_hand_follow_angle result: ", arm.rm_set_hand_follow_angle(hand_angle, True))
# time.sleep(1)
for j in range(6):
 for _ in range(200):
     hand_angle[j] += 50
     arm.rm_set_hand_follow_angle(hand_angle, True)
     time.sleep(0.005)          # 5 ms
 for _ in range(200):
     hand_angle[j] -= 50
     arm.rm_set_hand_follow_angle(hand_angle, True)
     time.sleep(0.005)
arm.rm_delete_robot_arm()- Dexterous Hand Position Follow Control
from Robotic_Arm.rm_robot_interface import *
import time

# Instantiate the RoboticArm class
arm = RoboticArm(rm_thread_mode_e.RM_TRIPLE_MODE_E)
# Create a robot arm connection and print the connection ID
handle = arm.rm_create_robot_arm("192.168.1.18", 8080)
print("handle.id",handle.id)
# Dexterous hand position follow control
hand_pos = [0,0,0,0,0,0]
print("rm_set_hand_follow_pos result: ", arm.rm_set_hand_follow_pos(hand_pos, True))
# time.sleep(1)
for j in range(6):
    for _ in range(200):
        hand_pos[j] += 50
        arm.rm_set_hand_follow_pos(hand_pos, True)
        time.sleep(0.005)          # 5 ms
    for _ in range(200):
        hand_pos[j] -= 50
        arm.rm_set_hand_follow_pos(hand_pos, True)
        time.sleep(0.005)
arm.rm_delete_robot_arm()