

Robot Body Operation:
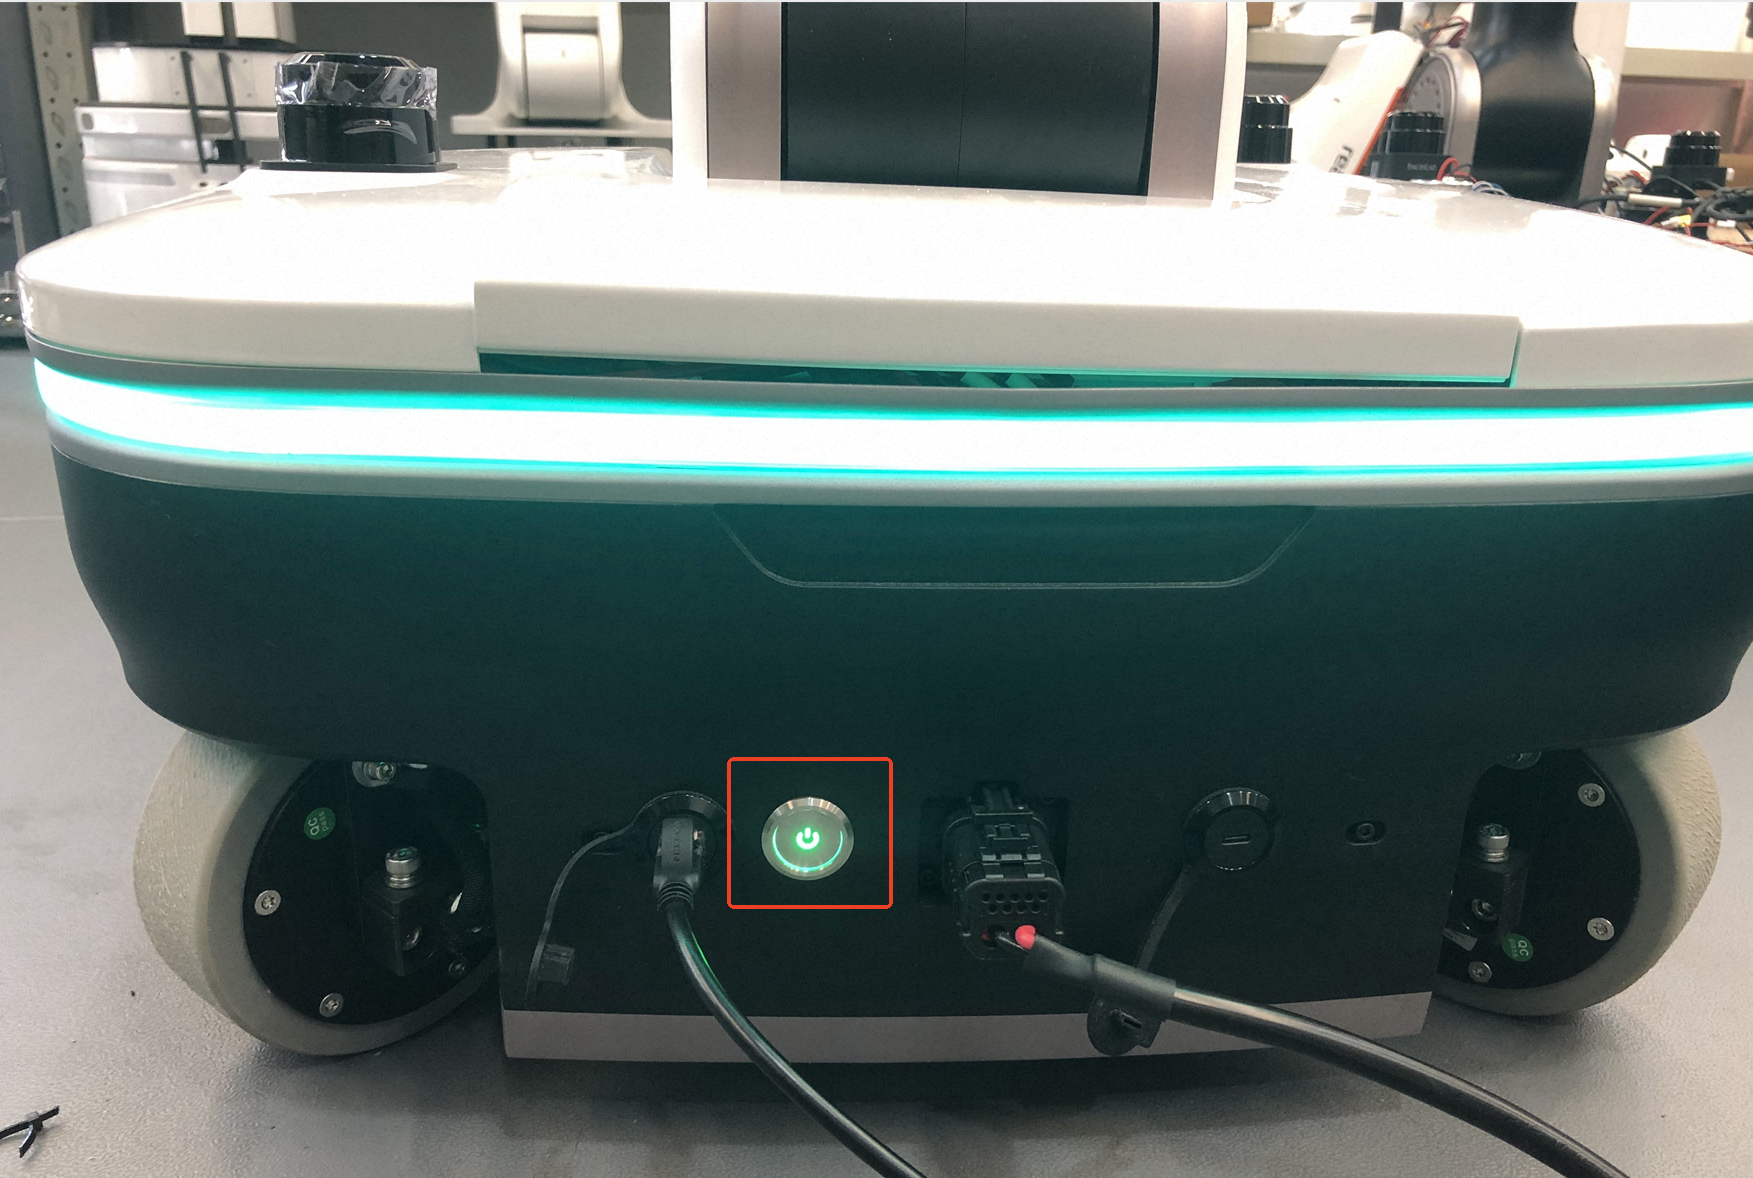
Chassis External Interfaces Power On/Off
Press the robot's battery switch to power on (pressed state) and power off (released state).
Emergency Stop
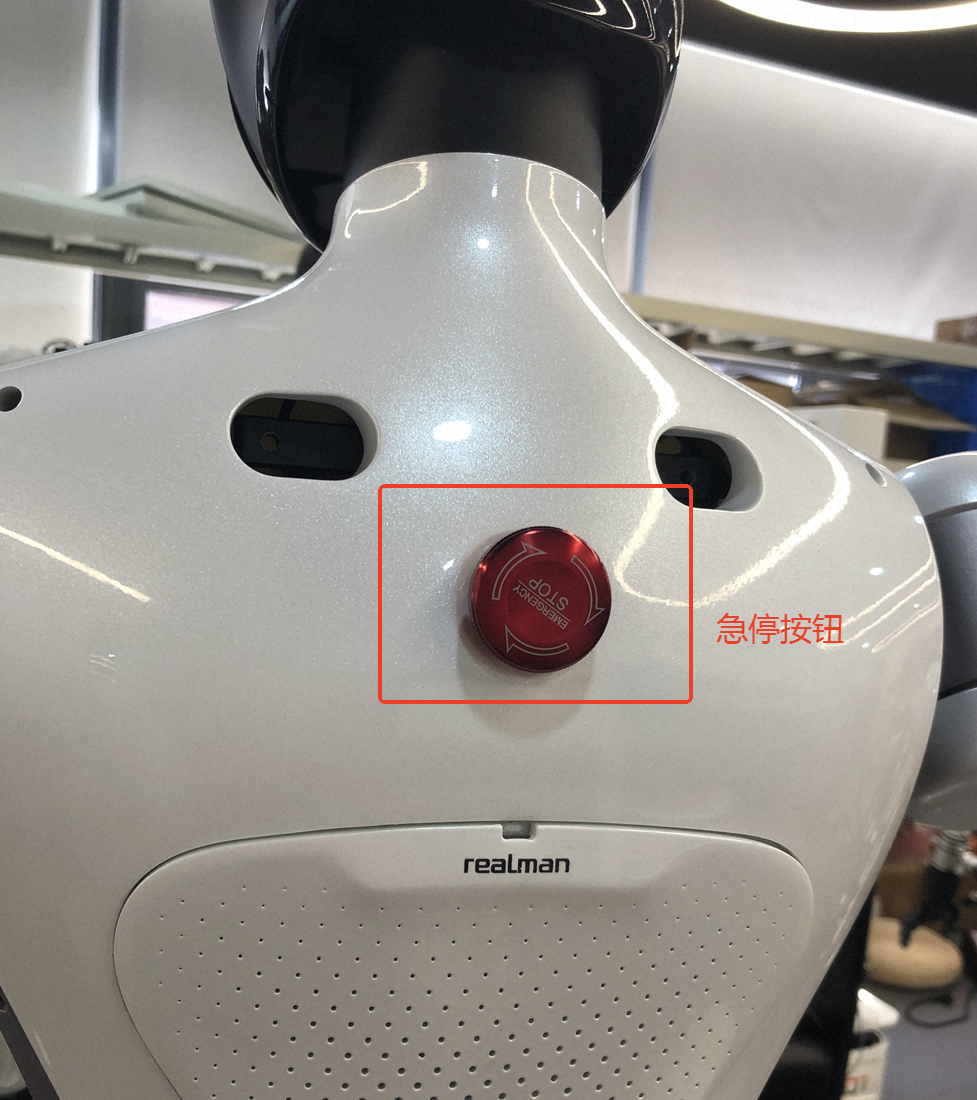
Emergency stop: While controlling the actual motion of the robot, press the [Emergency Stop] button quickly in an emergency to stop the robot immediately. This cuts off the 48V power supply, de-energizing the robot's waist, robotic arms, and other parts.
Restore power: After confirming that the hazard has been removed, rotate the [Emergency Stop] button in the direction of the arrow on it to restore power to the robot.
As shown below:
Charging
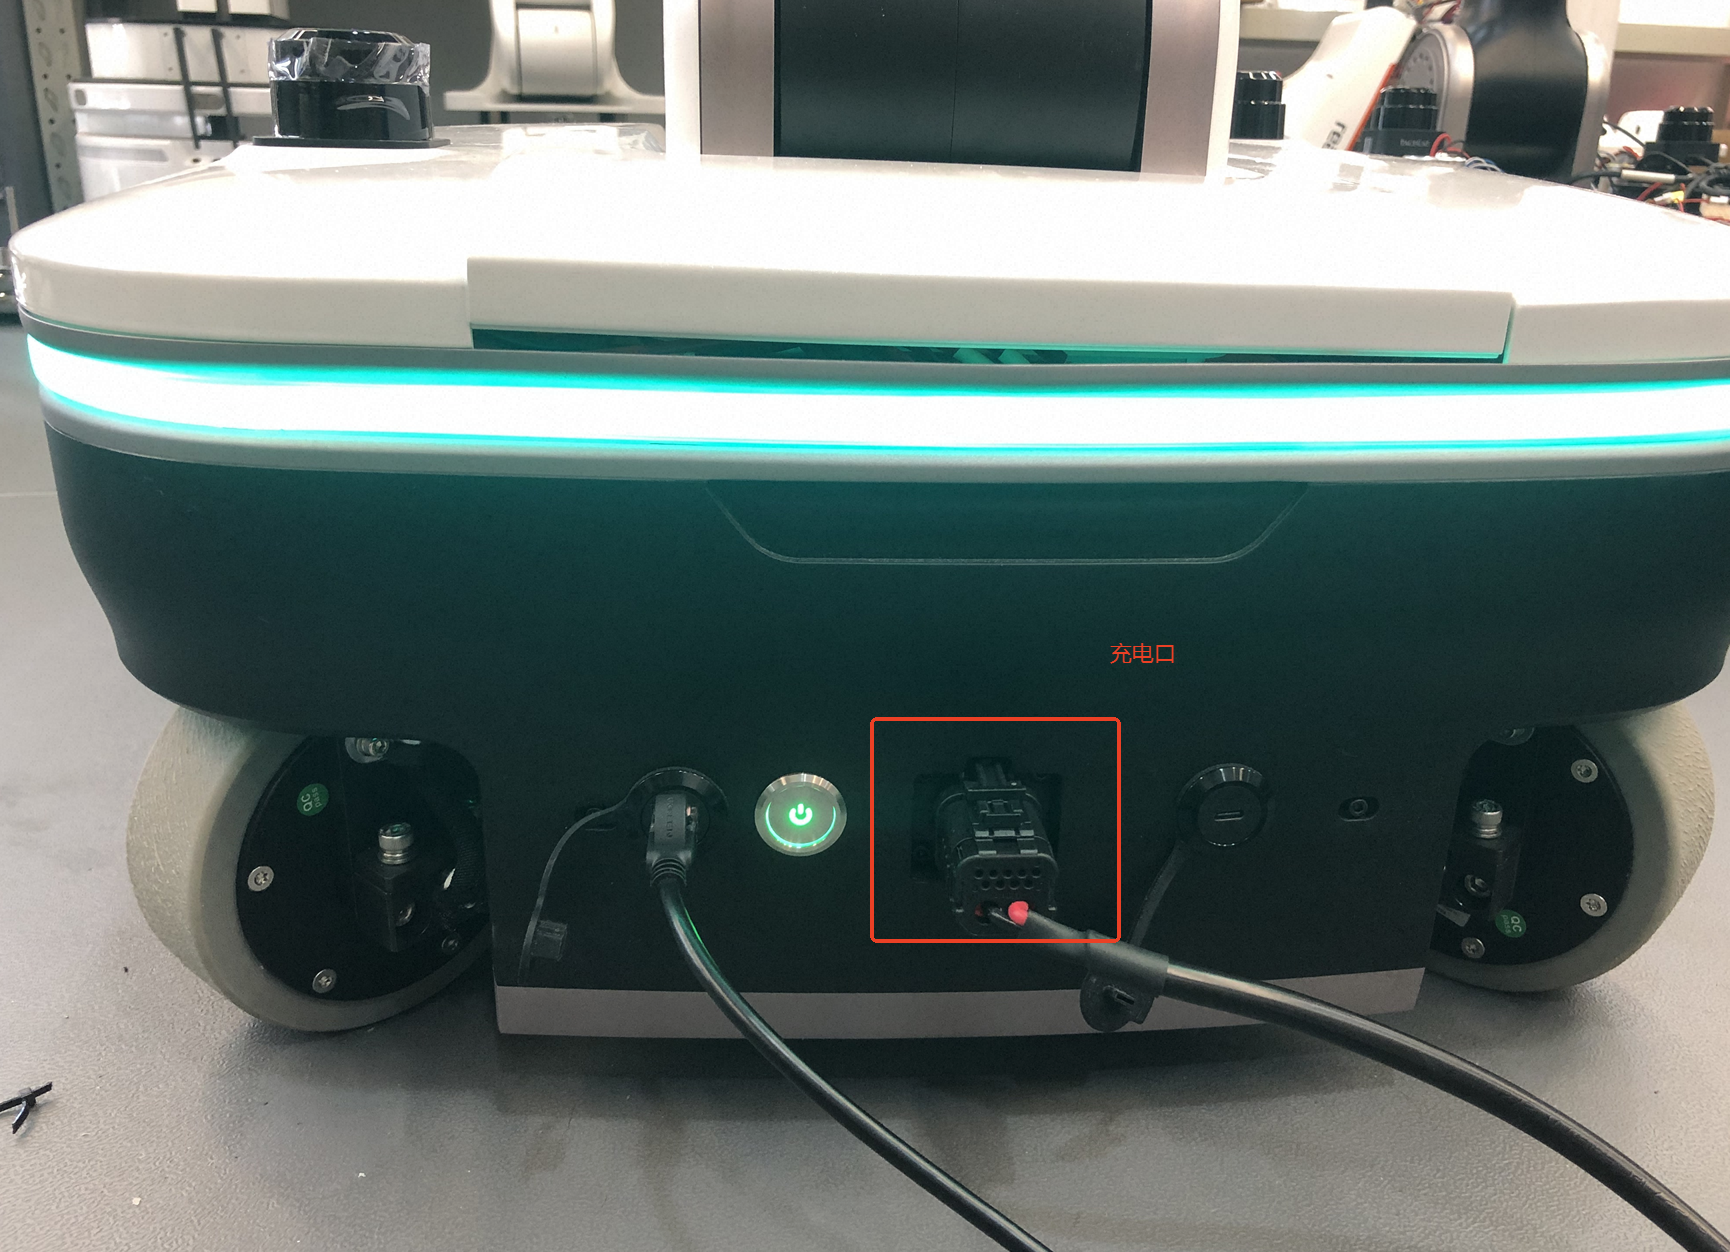
The S2 robot has two batteries (left and right). When charging, connect the charger as shown in the red box in the figure below.
Charging procedure:
Check the orientation of the robot's charging port and the charger plug. The connector has a keying structure; plug it in as shown in the figure;
Insert the battery-side plug into the robot's battery port and lock it;
Then plug into the mains power supply (the AC side of the charger);
While charging, press the green power button shown in the figure and keep it pressed, which indicates that the battery is charging.
Note
If the power button is not pressed when the power supply is plugged in, the battery will not charge.
Other Interfaces
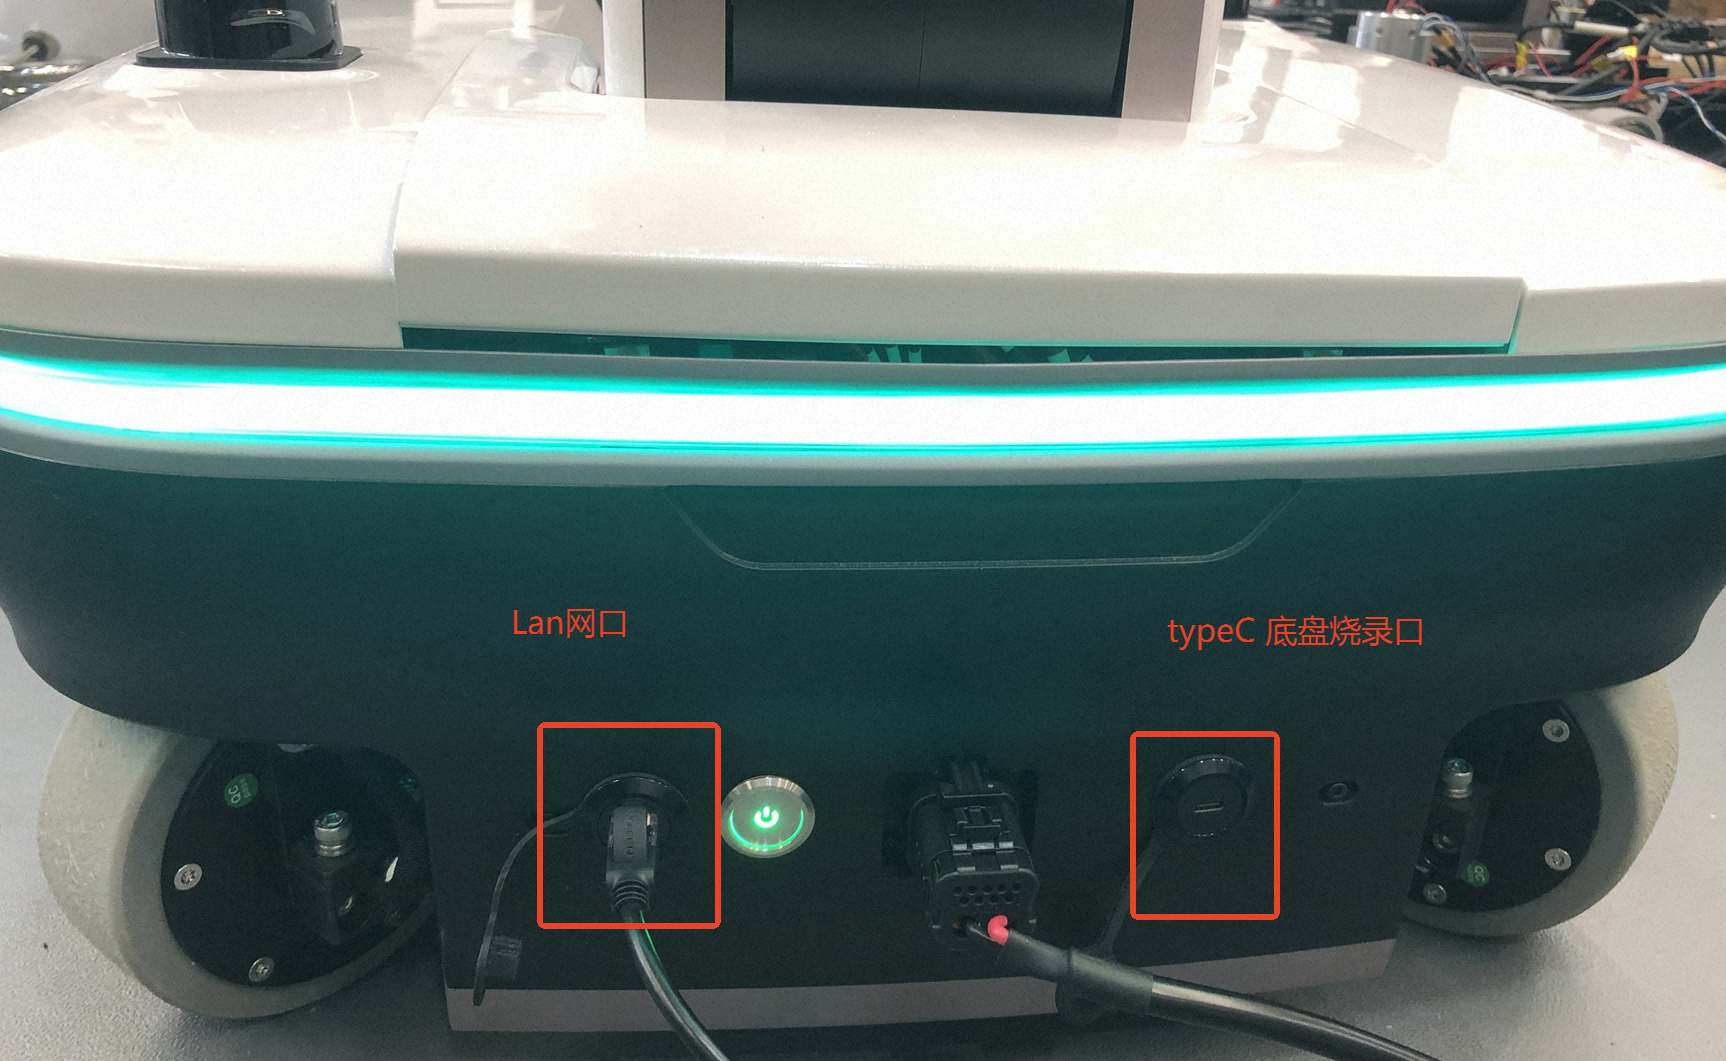
LAN port: A local computer can connect to the robot via a network cable to access the main controller or the robotic arm teaching pendant; it can also be used to connect to the robot during local teleoperation with the RX71 homogeneous arm or the Aloha servo arm.
Chassis TypeC port: Used for chassis flashing or viewing chassis logs.