Start guide:
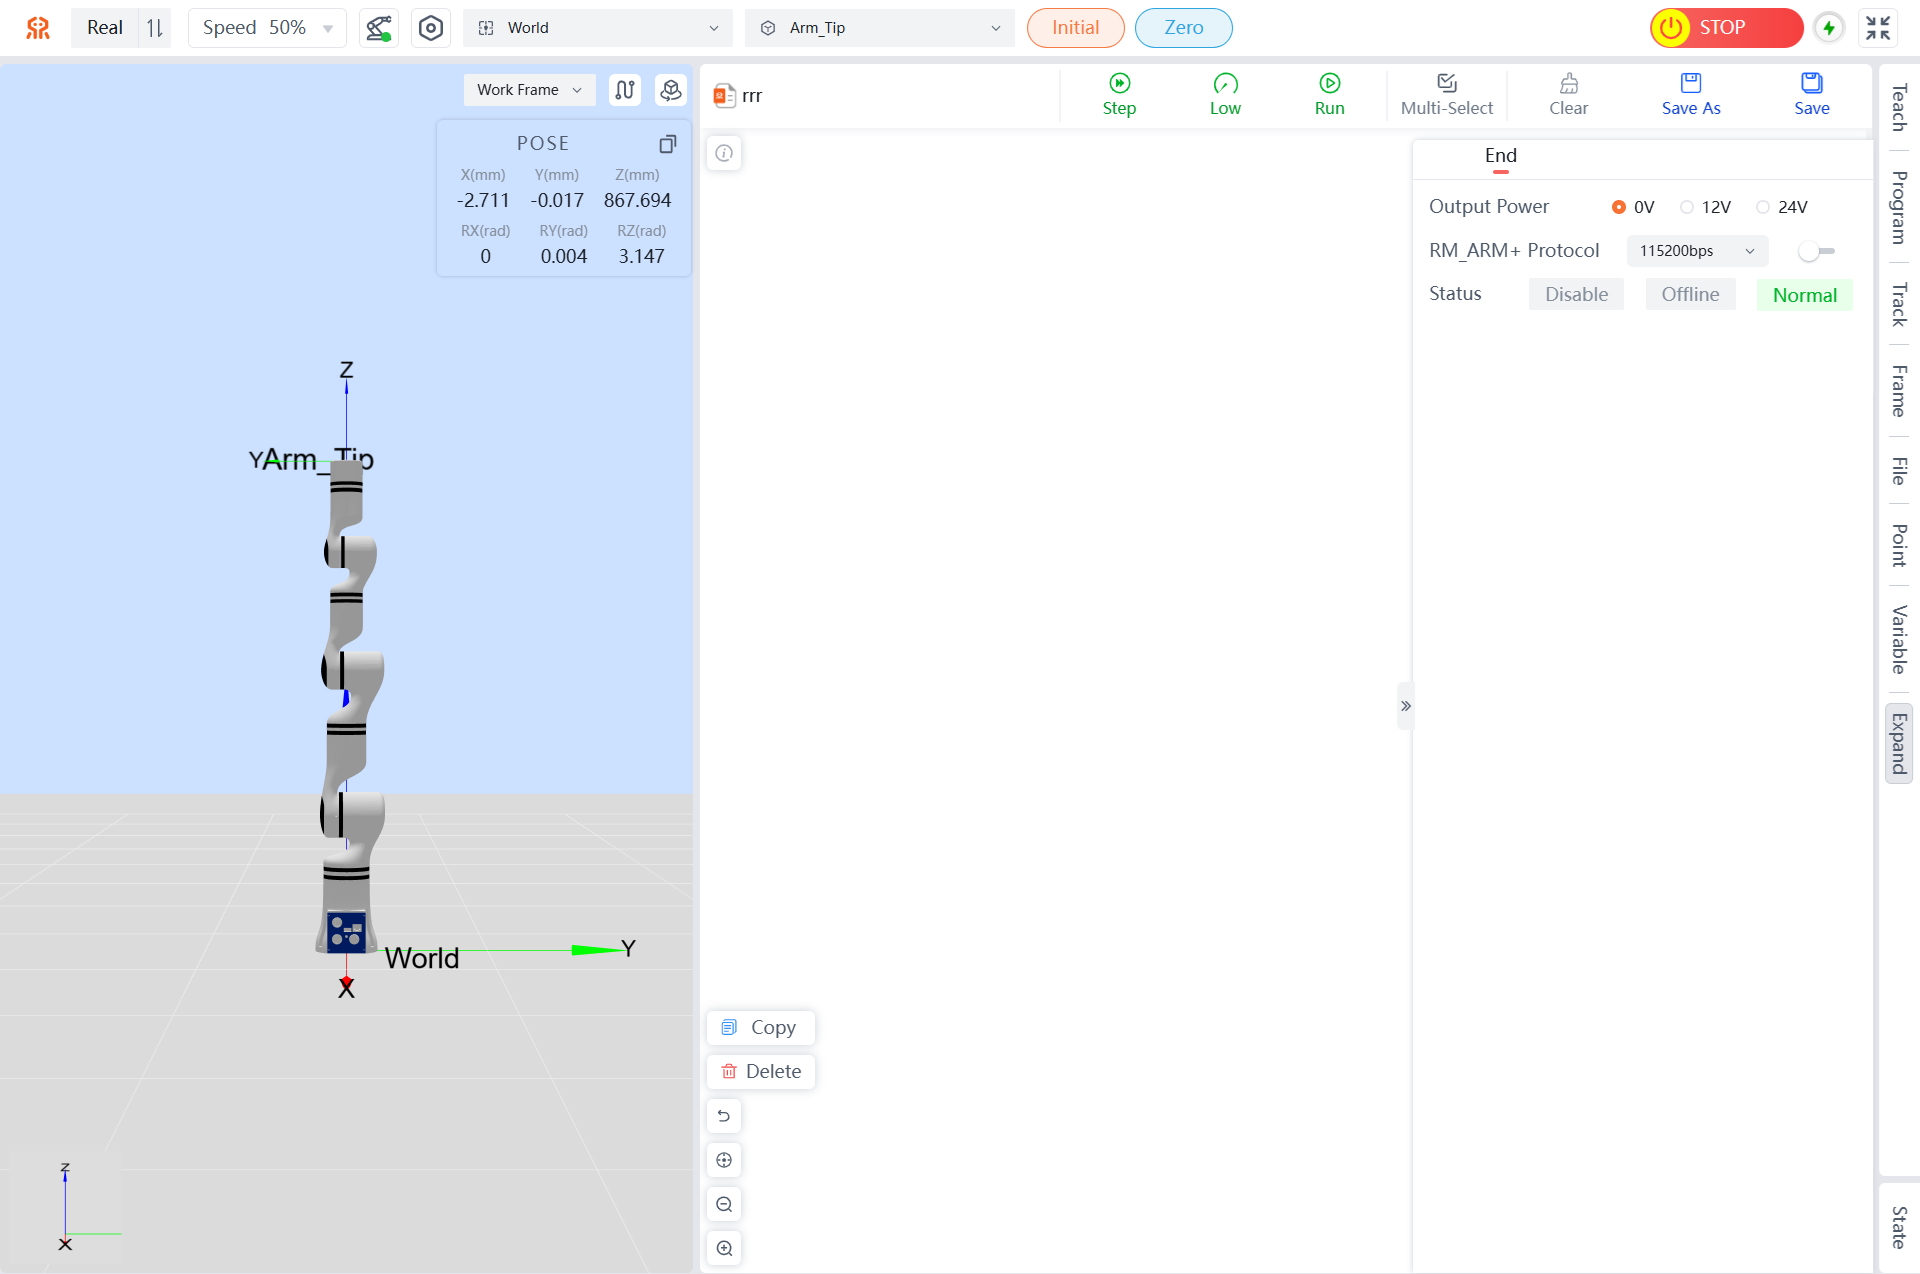
Robotic Arm Extension The extension interface on the teaching pendant allows for configuration of the end effector, as shown in the figure below:
End Effector Control
End-Effector Ecosystem Protocol
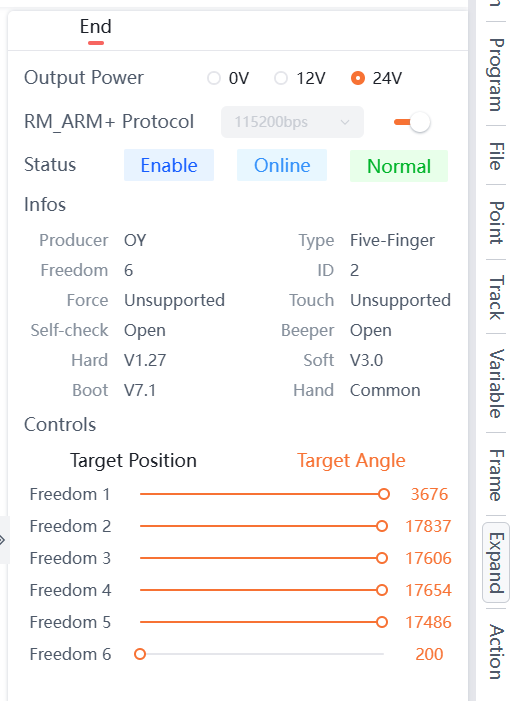
In the Expand interface of the teaching pendant, configuration of end effectors is supported. It allows switching the output power of the tool end; it can automatically identify connected end effectors via the RM_ARM+ Protocol and enable basic control.
- Output Power: It enables configuration of the output power voltage from the end-effector interface board, supporting three levels of settings: 0V, 12V and 24V.
- RM_ARM+ Protocol: When compatible ecosystem devices are installed at the robotic arm's end, the system will automatically identify the device type (such as two-finger grippers, five-finger dexterous hands) and display their status and detailed information after this protocol is enabled. It supports four communication baud rates: 9600bps, 115200bps, 256000bps and 460800bps; users can adjust parameters like target position and target angle via sliders.
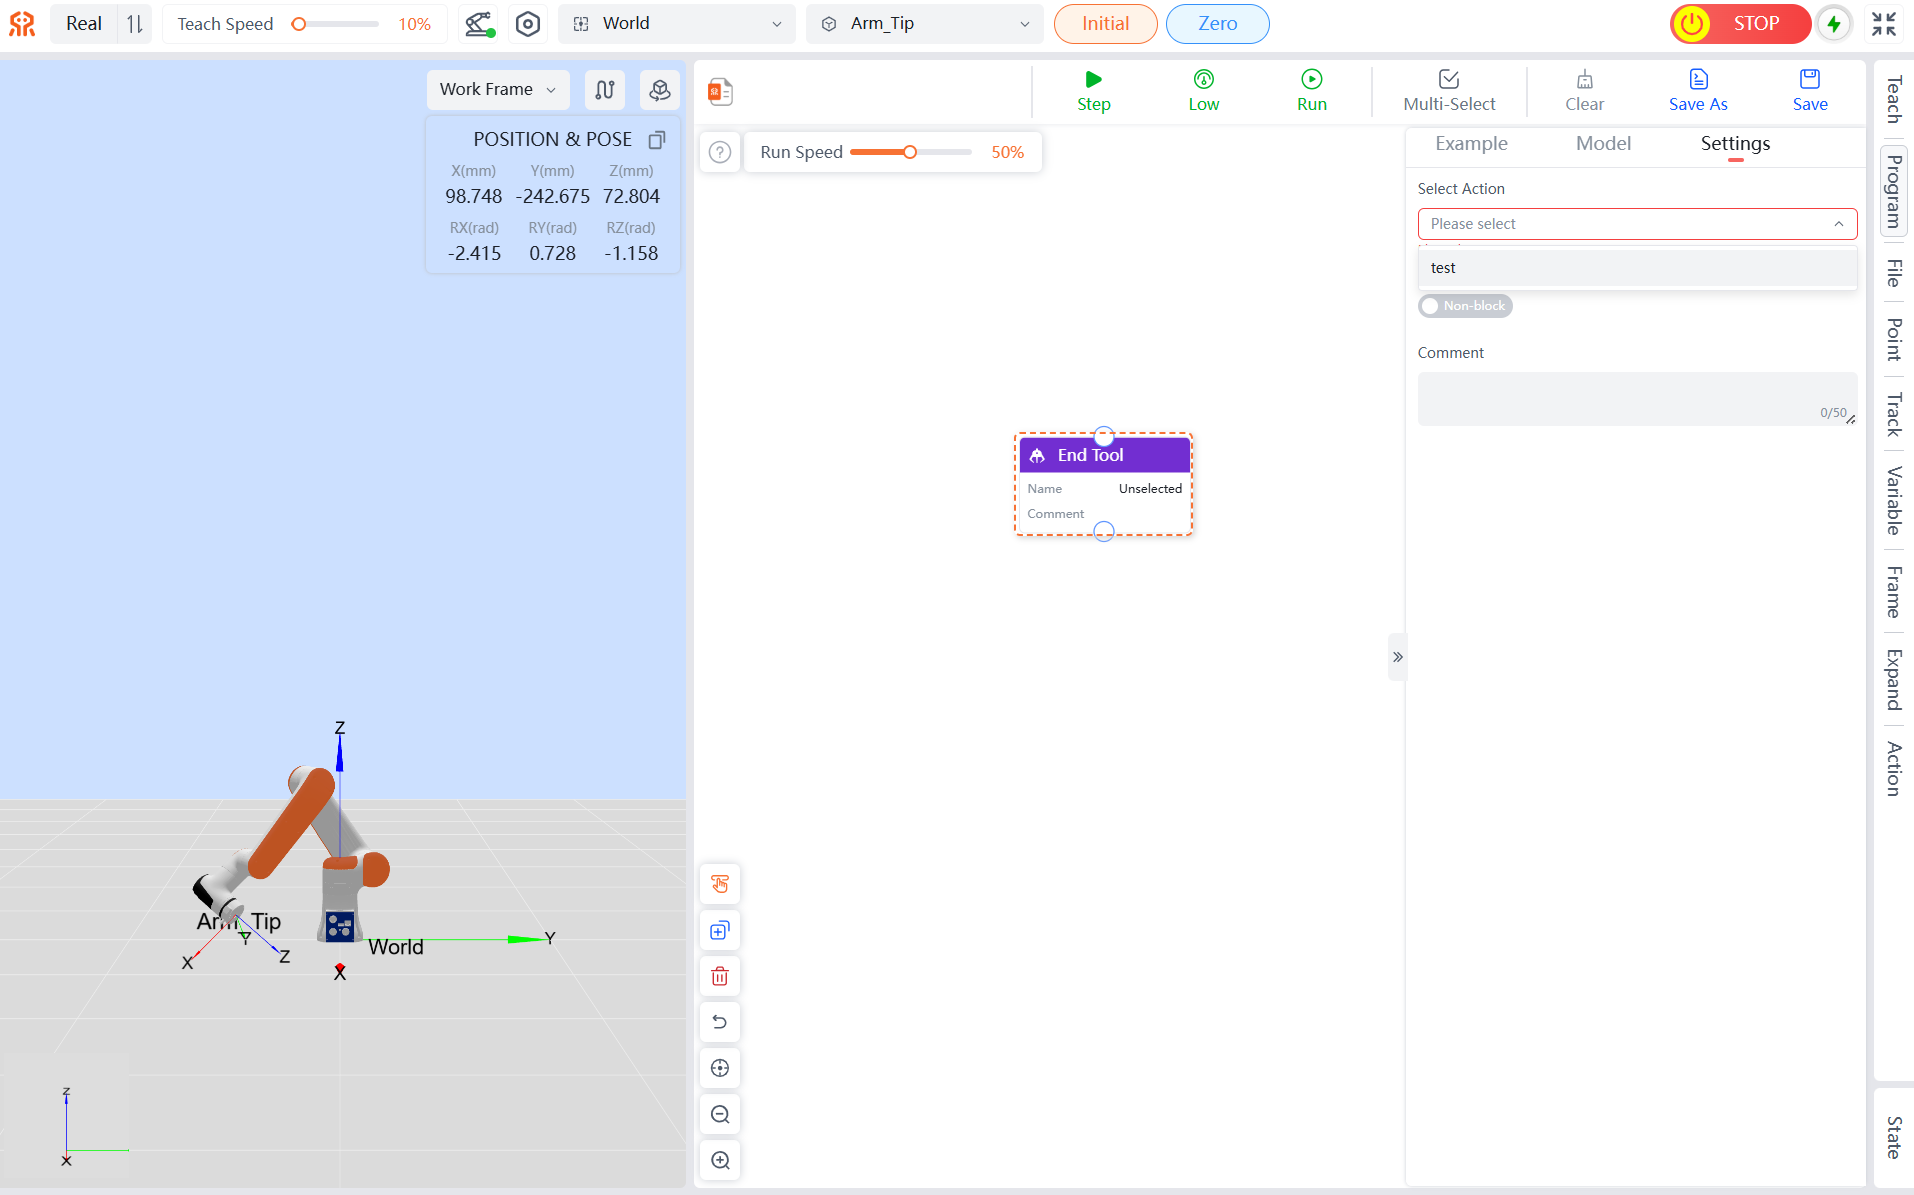
End-Effector Action
End Motion Management enables efficient full-process management of end motions, covering their entire lifecycle from creation to invocation. Supports saving target position or target angle data as action. Meanwhile, it provides end motion file management capabilities, making it convenient for users to organize, maintain, and retrieve saved motion files; in graphical programming scenarios, users can directly invoke the saved end motions to simplify programming operations and enhance overall efficiency.
Add Action:
- Create New Action: Click the
Addbutton to navigate to theExpand > Endpage, customize information such as target position and target angle, and complete the creation of the action file. - Import Action: Click the
Importbutton to upload a local action file and complete the addition of the action file.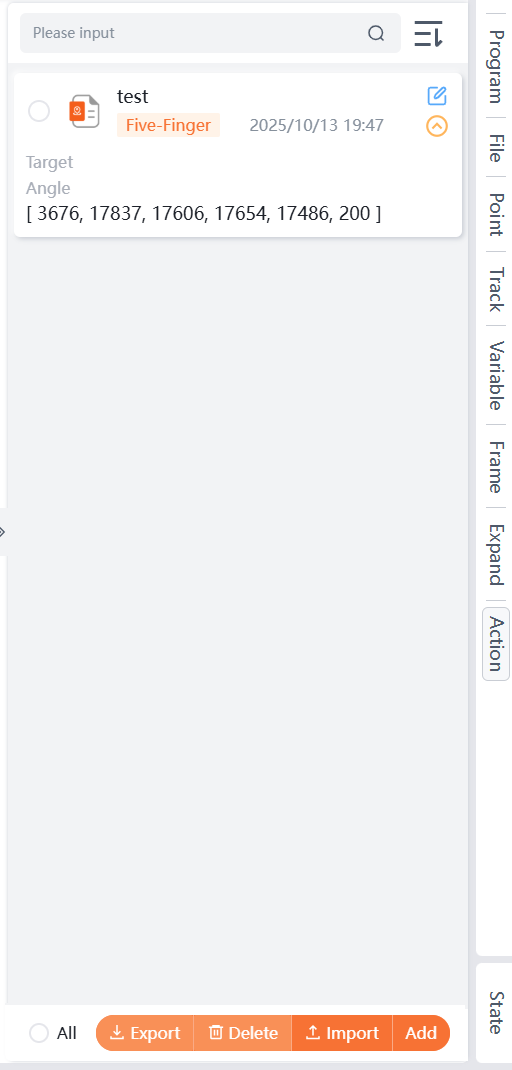
- Create New Action: Click the
Manage Action: Supports operations such as querying, modifying, exporting, and deleting action files.
Invoke Action:
- On the
Program > Modelpage, add theEnd-Toolto the canvas.
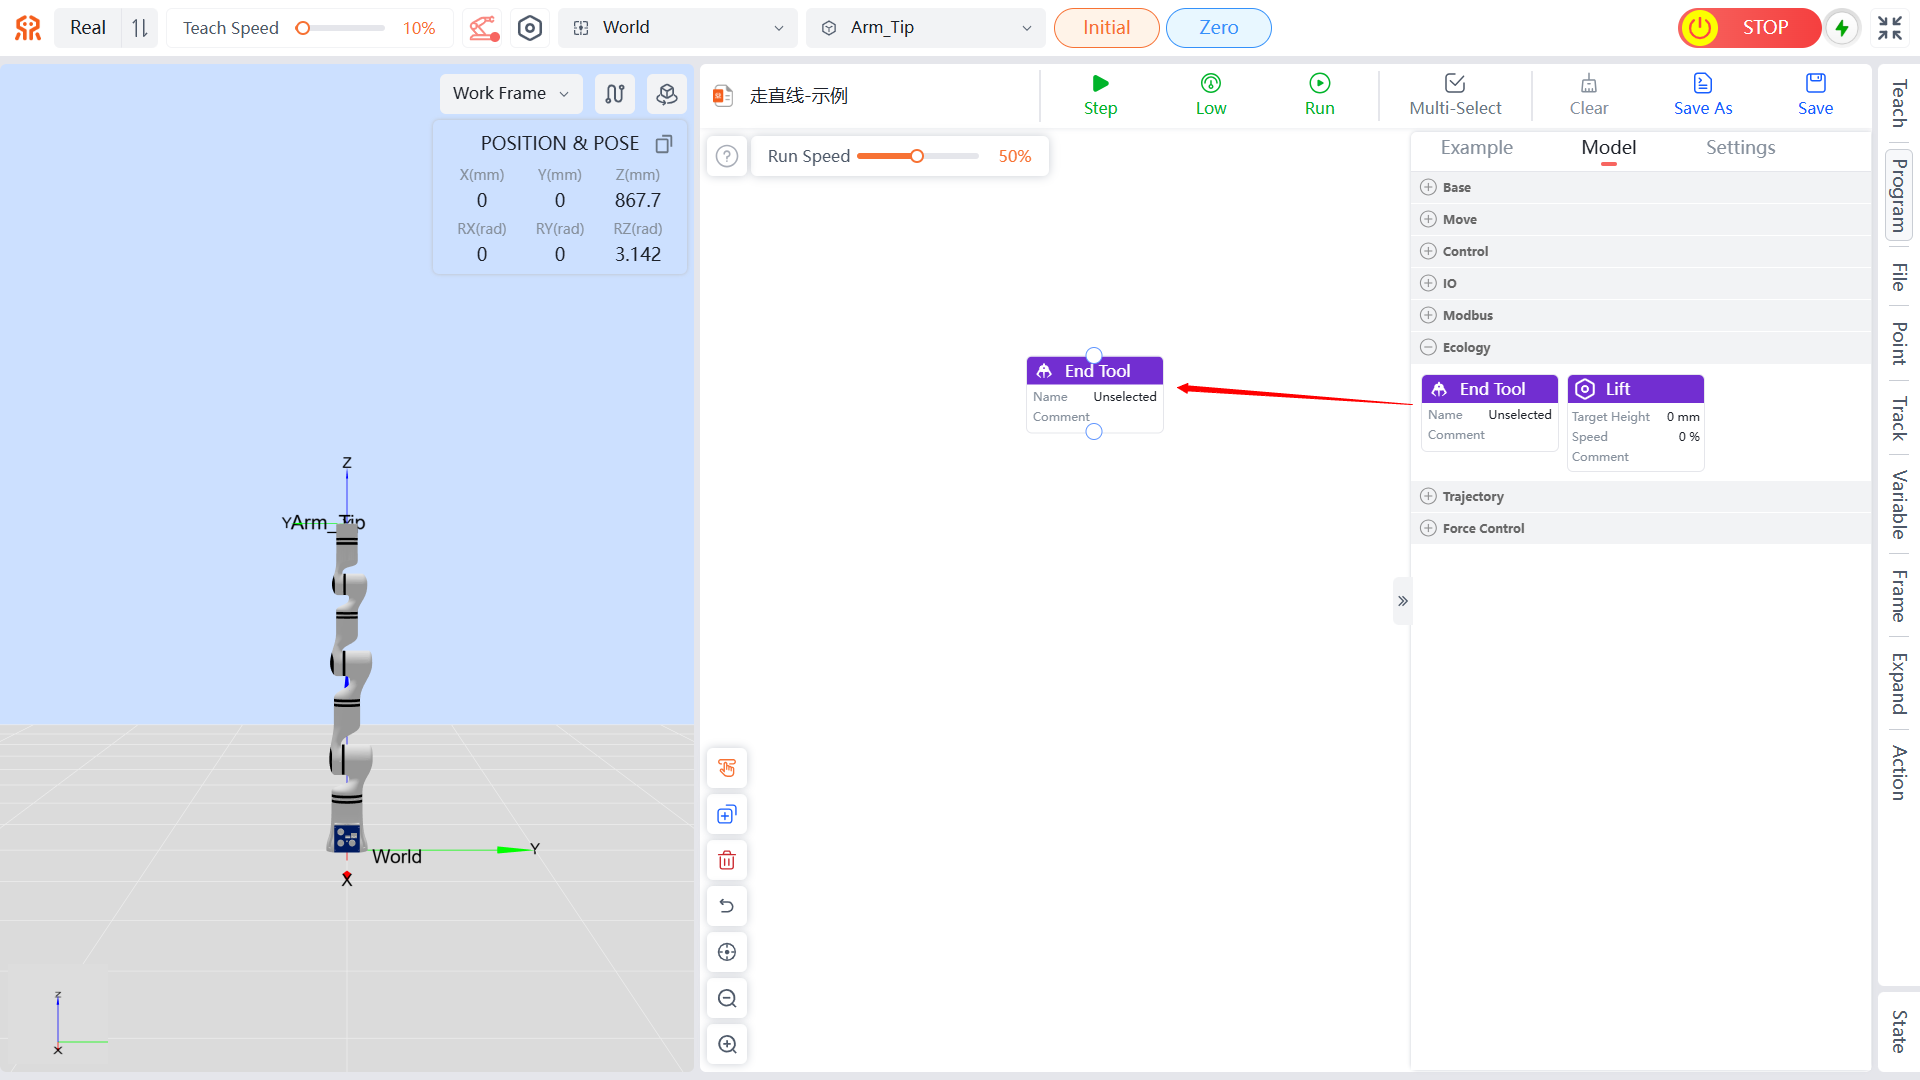
- Select the added End-Tool, click
Settings, and configure the action file on theSettingspage.
- On the
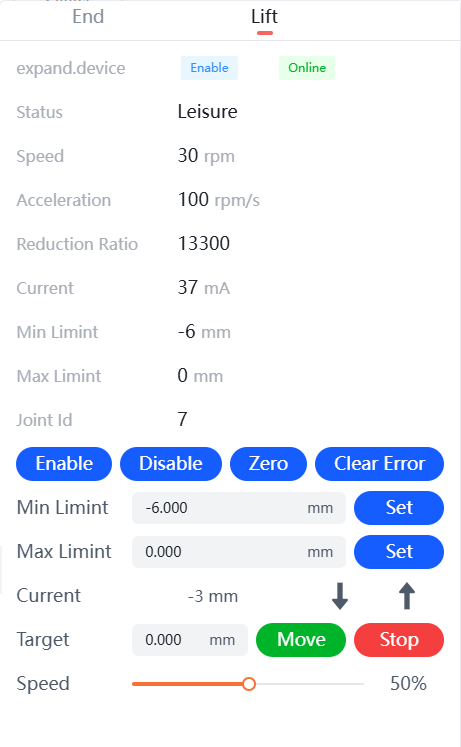
Lift Control and Expand Joints Control
The expand interface on the teaching pendant allows for parameter configuration of the lift control, as shown in the figure below. You can move the lift up or down from the current position, or set a target position and click the Move button to reach the desired height.
The expand interface on the teaching pendant also allows for control of the expand joints, with parameter settings as shown in the figure below:
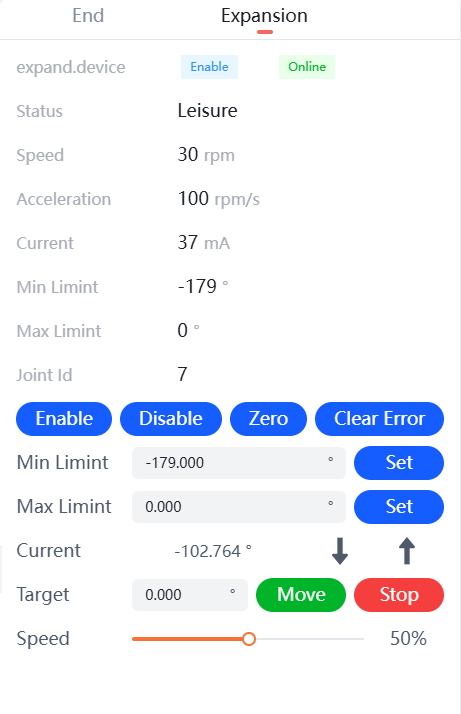
After connecting the expand joints, the current expand device, status, speed, acceleration, current, maximum and minimum limits, and joint ID will be displayed. To prevent errors in the joint after connection, clear the joint errors first and then enable the joint. The expand joints can move in the positive or negative direction. You can set the target angle for movement, and the movement speed of the expand joints can be adjusted below.